Building an Intelligent Terminal Dev Environment on Ubuntu with Claude Code and DeepSeek V3.2
Preface
In today’s software engineering practices, directly integrating large language models (LLMs) into the local development environment has become an important way to improve development efficiency. Compared with the traditional “copy → paste → debug” workflow, terminal-based AI development assistants can directly understand code context, execute system commands, and participate in the entire software lifecycle.
Claude Code is a new-generation command-line AI assistant released by Anthropic. It can not only understand an entire code repository, but also execute shell commands, create files, and modify project structures. DeepSeek V3.2, as one of the models with outstanding reasoning and coding capabilities, can be seamlessly integrated into Claude Code as its reasoning backend through an OpenAI-compatible API.
This article starts from scratch and provides a complete walkthrough on how to build an intelligent terminal development environment based on Claude Code with DeepSeek V3.2 as the underlying model on Ubuntu. The entire process covers system environment preparation, Node.js runtime deployment, CLI tool installation, API gateway configuration, automation script packaging, and hands-on practice with a terminal AI agent.
Phase 1: Building the Underlying System Environment
Any stable development environment must begin with a solid operating system foundation. Before deploying Node.js, native build modules, or Python extensions, it is necessary to ensure that the system’s package index and core build tools are up to date.
First, update the APT package index and upgrade installed packages. Then install several common but essential basic tools:
- curl: for downloading remote scripts and making API requests
- git: for source code version control
- build-essential: includes GCC, G++, and make
- libssl-dev: SSL-related development libraries
sudo apt update && sudo apt upgrade -y
sudo apt install -y curl git build-essential libssl-dev
After executing the above commands, the APT package manager will resolve the dependency tree and download the required packages.
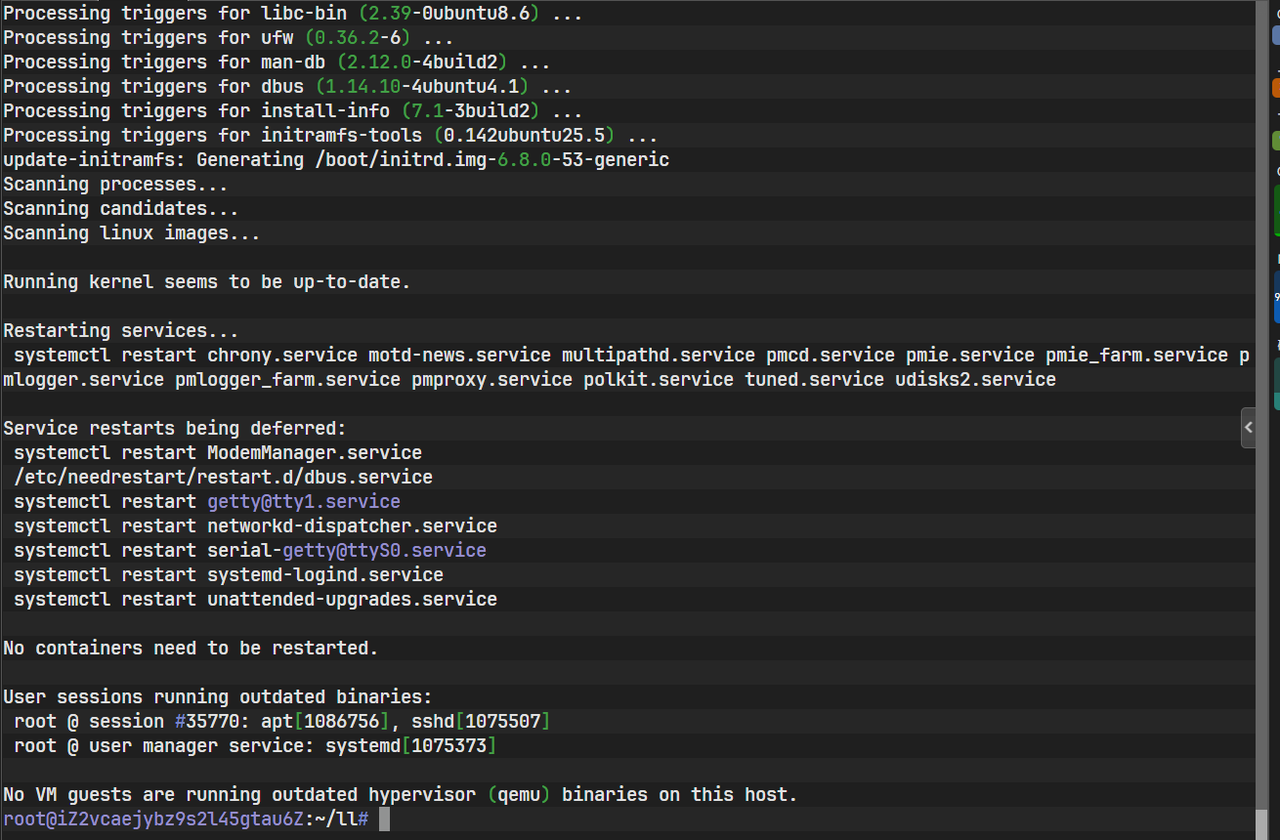
The image above shows the terminal state after the installation of the basic dependencies.
Once completed, the system is capable of compiling native modules and running modern web tools, laying a solid foundation for installing Node.js and AI CLI tools.
Phase 2: Deploying the Node.js Runtime Environment
Claude Code is essentially a JavaScript / TypeScript-based command-line tool, so the Node.js runtime is its most fundamental prerequisite.
The Node.js version in Ubuntu’s default repositories is usually outdated. To avoid compatibility issues, it is recommended to use the official NodeSource binary repository and directly install the long-term support (LTS) version of Node.js 20.x.
curl -sL https://deb.nodesource.com/setup_20.x | sudo -E bash -
sudo apt-get install -y nodejs
This step installs both Node.js and npm. After installation, you can verify that the environment is working by checking the version numbers:
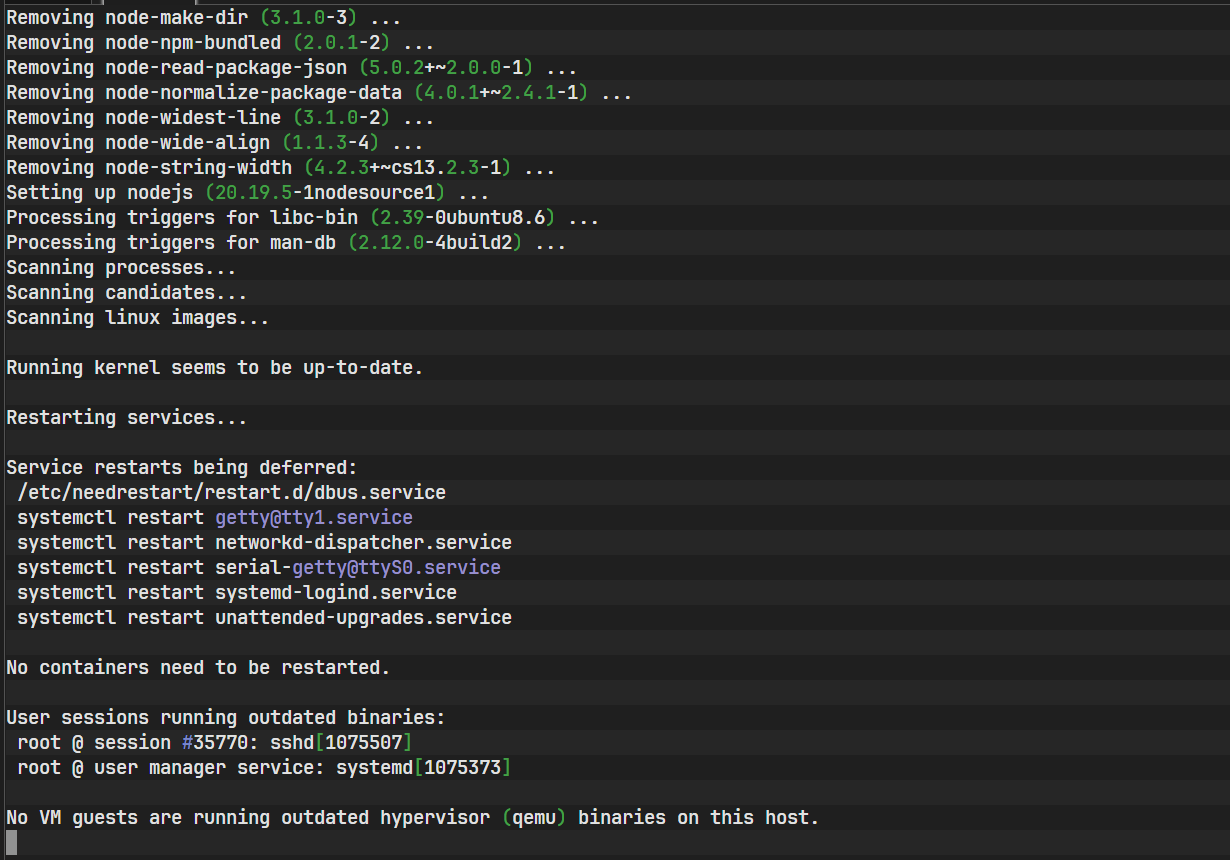
The image above records the process of configuring the repository via the NodeSource script and completing the installation.
node -v
npm -v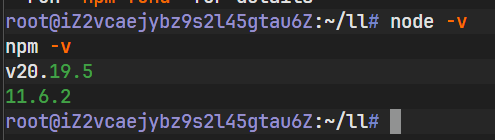
As shown above, the terminal outputs the Node.js version number. If the version is printed correctly, the JavaScript runtime environment is ready.
Phase 3: Installing and Initializing Claude Code
Claude Code is distributed as a global command-line tool, so it needs to be installed using npm’s global installation mode.
npm install -g @anthropic-ai/claude-code
After installation, the claude command will be registered in the system PATH
and can be invoked directly from any directory.
At this point, if you run claude directly, a connection error will usually occur.
This is because the tool attempts to access Anthropic’s official API by default,
and no API endpoint or authentication information has been configured yet.
This error actually confirms that the tool itself has been installed successfully. What remains is simply to “tell it where to call the model.”
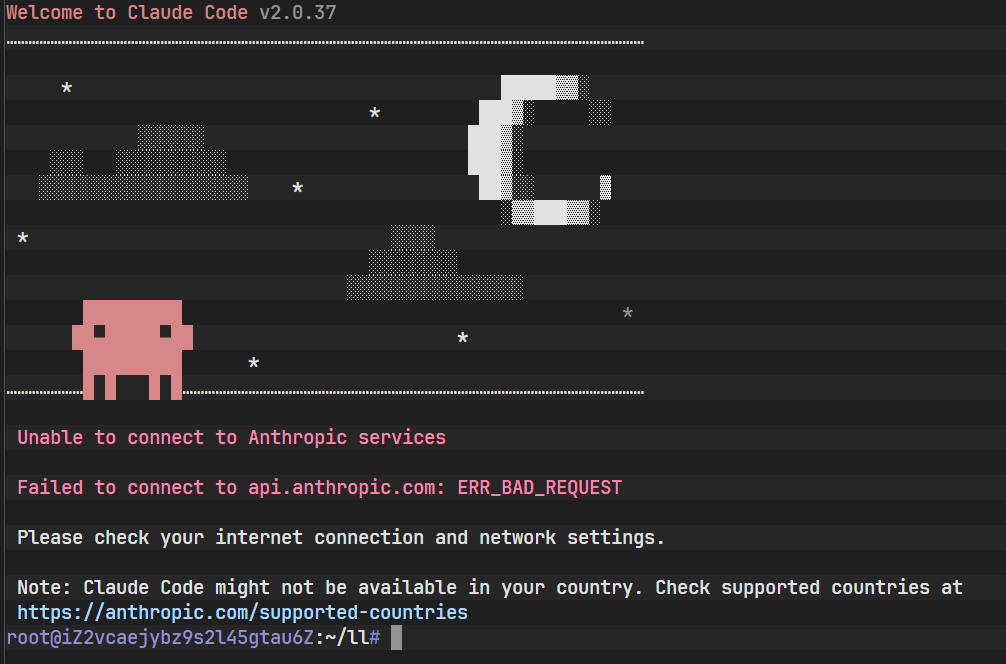
The image above shows the error message when running the claude command for the first time. The system reports a connection or authorization error, confirming that the tool is installed correctly but lacks the required network configuration and authentication. This introduces the most critical step in the setup process—environment variable configuration.
Phase 4: API Gateway Configuration and Authentication
Claude Code supports overriding the default API configuration via environment variables, allowing it to work with any third-party model service compatible with the OpenAI API specification.
First, visit the Lanyun console to obtain an API key. This key is the唯一 credential used for identity verification and billing.
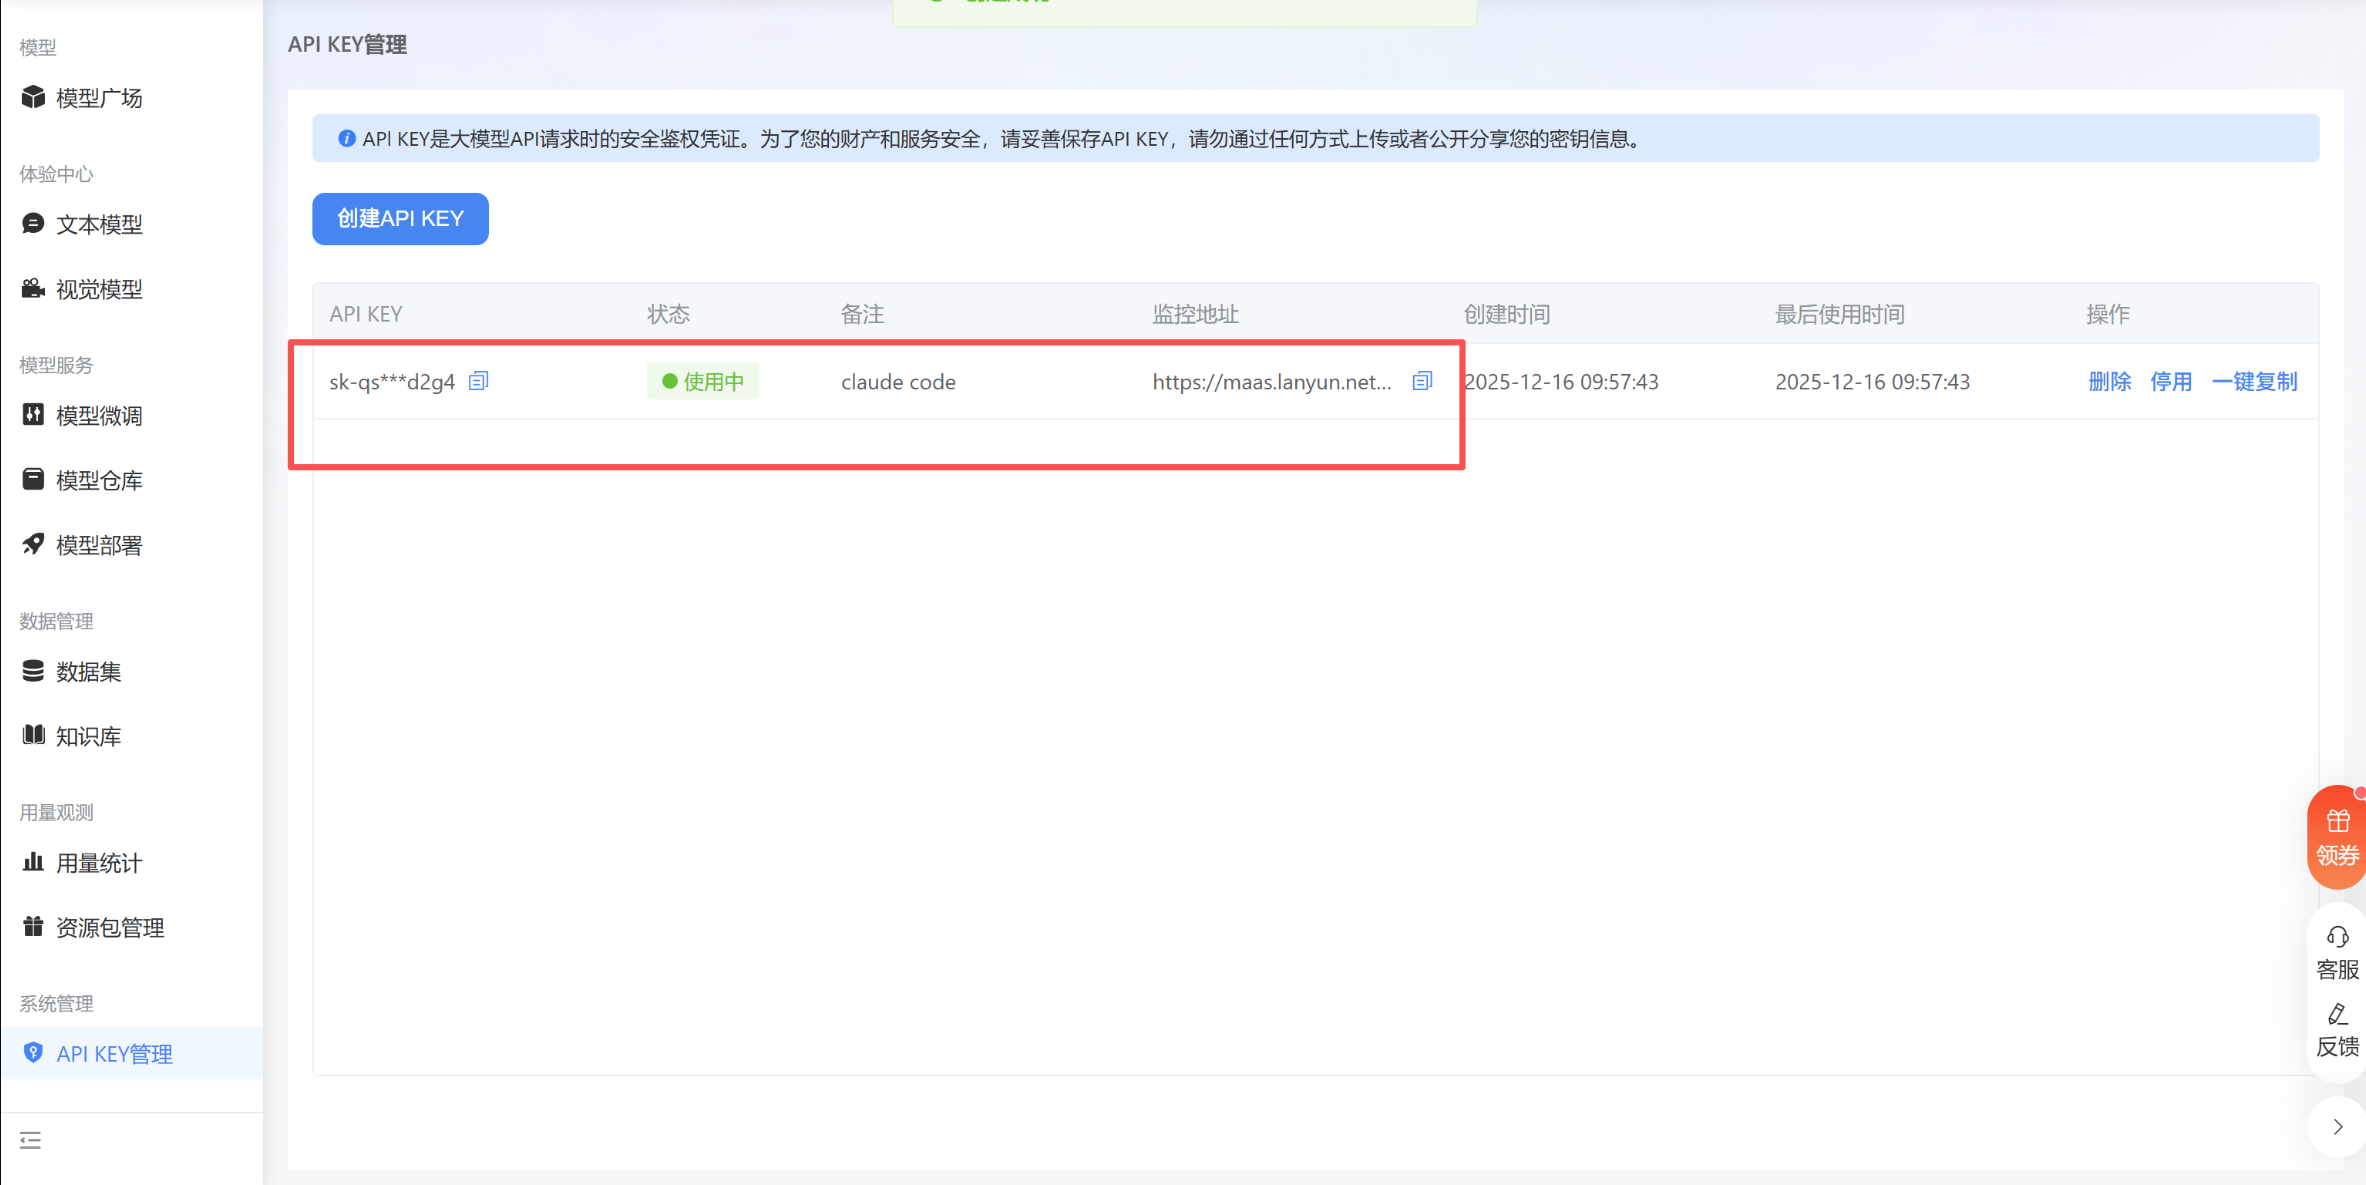
After obtaining the key, it needs to be injected into the user’s shell configuration file.
To use DeepSeek V3.2 hosted on Lanyun, the following three core environment variables must be configured:
- ANTHROPIC_BASE_URL: API gateway endpoint
- ANTHROPIC_AUTH_TOKEN: API key
- ANTHROPIC_MODEL: model ID
echo 'export ANTHROPIC_BASE_URL="https://maas-api.lanyun.net/anthropic-k2/"' >> ~/.bashrc
echo 'export ANTHROPIC_AUTH_TOKEN="sk-xxxxxxxxxxxxxxxx"' >> ~/.bashrc
echo 'export ANTHROPIC_MODEL="/maas/deepseek-ai/DeepSeek-V3.2"' >> ~/.bashrc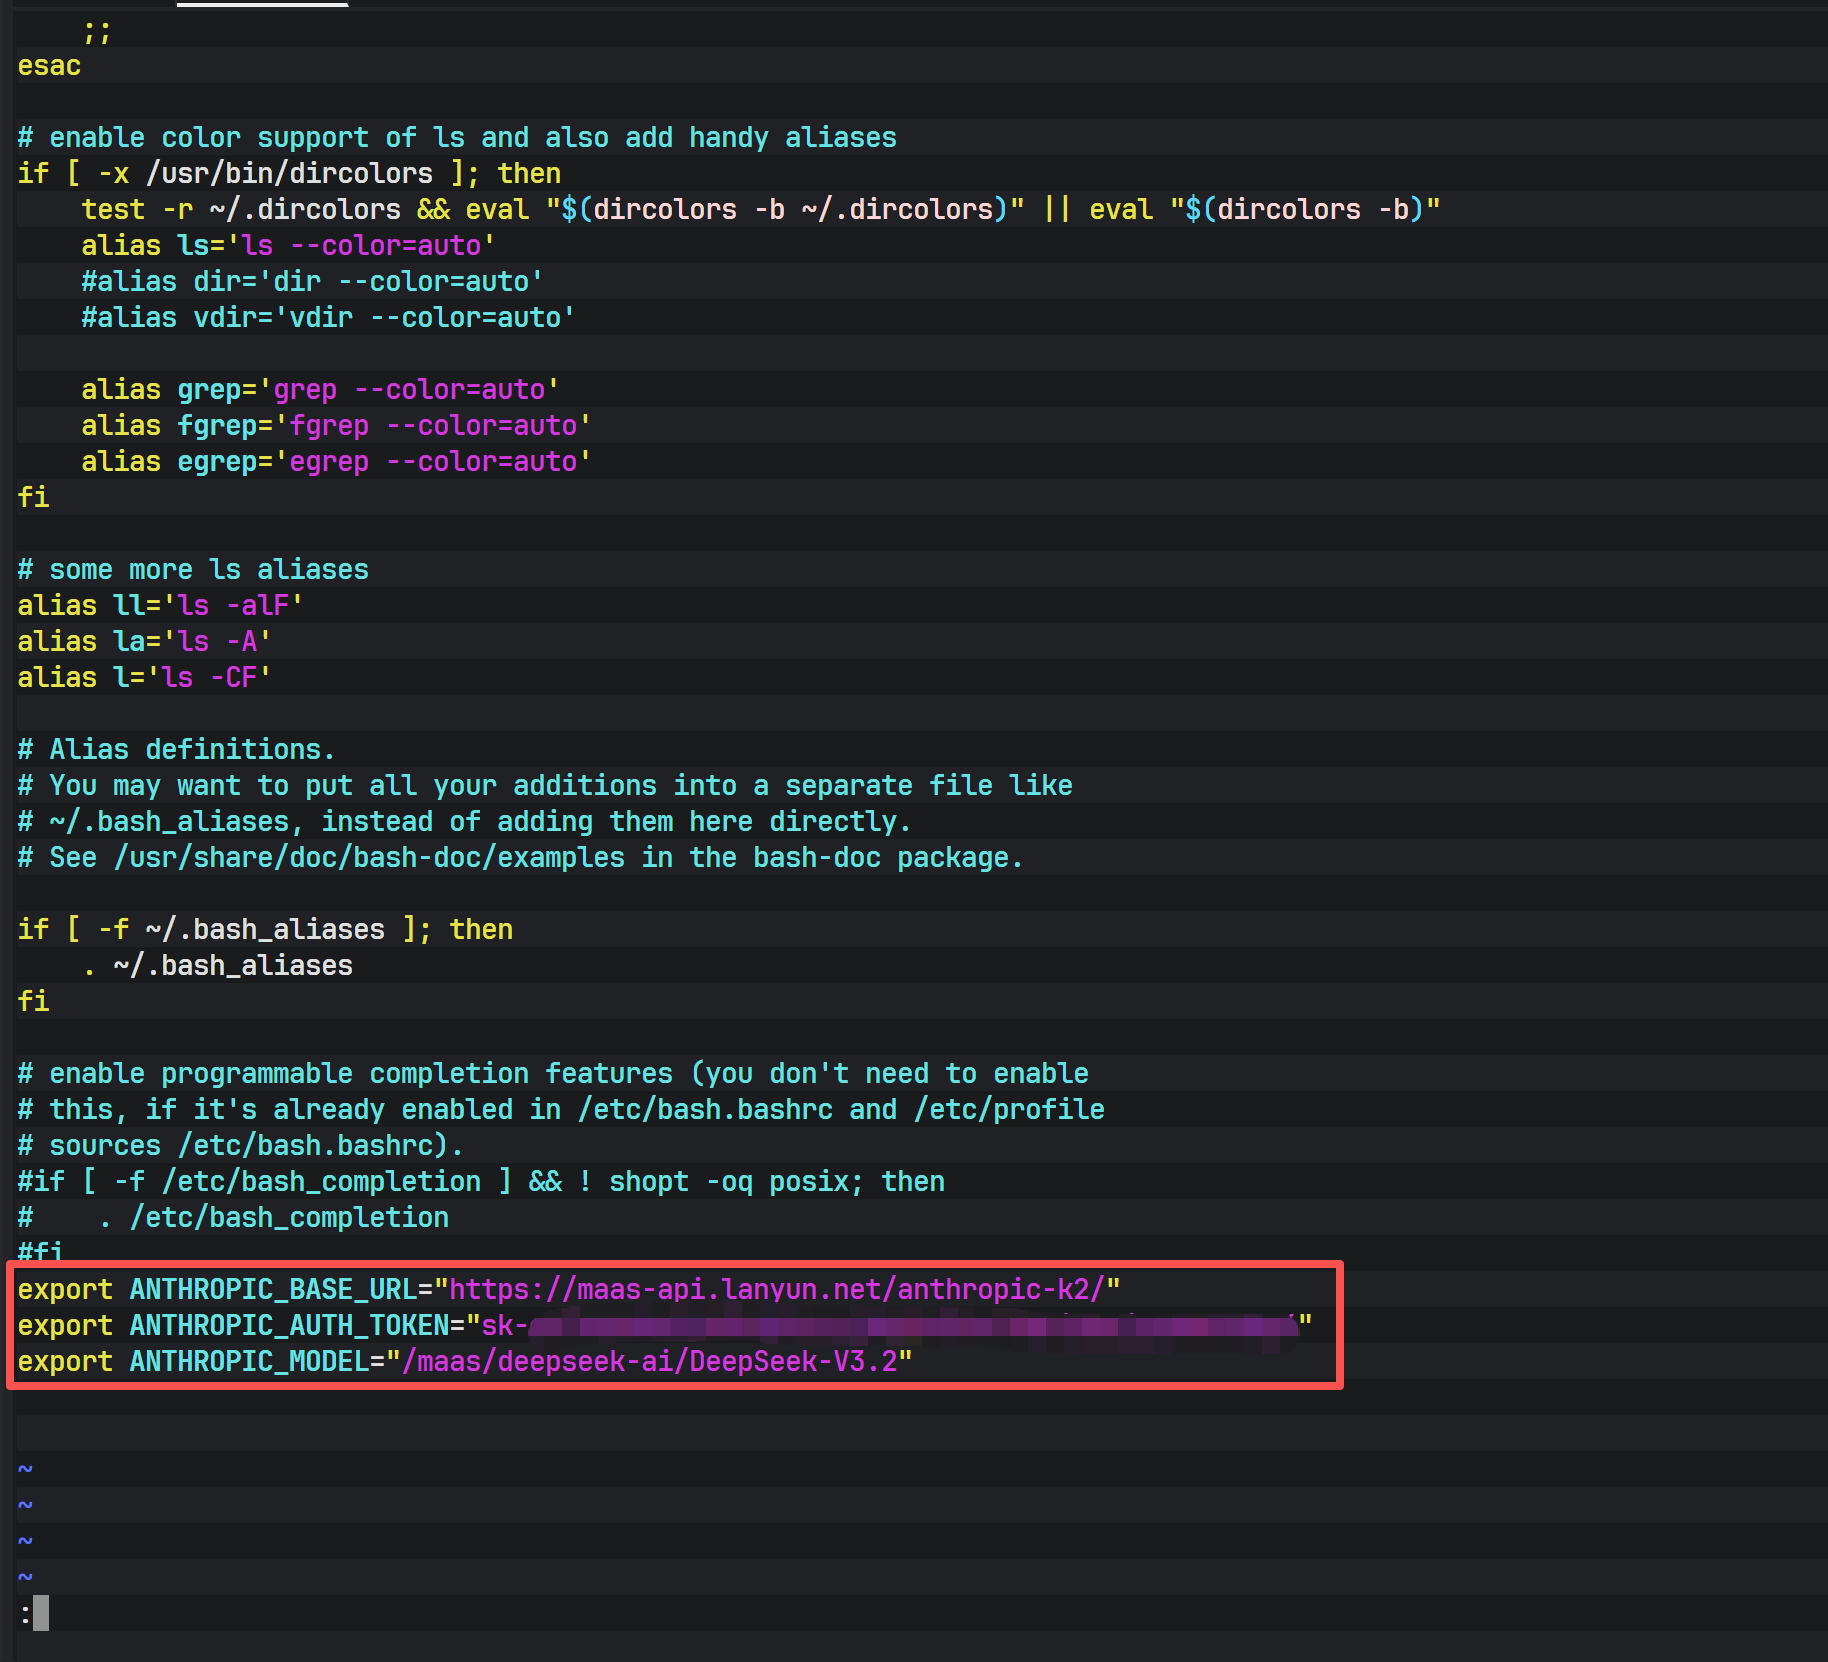
Using echo and the redirection operator >> appends the configuration to the end of the file, ensuring persistence across terminal sessions and system reboots.
After making the changes, reload the configuration immediately:
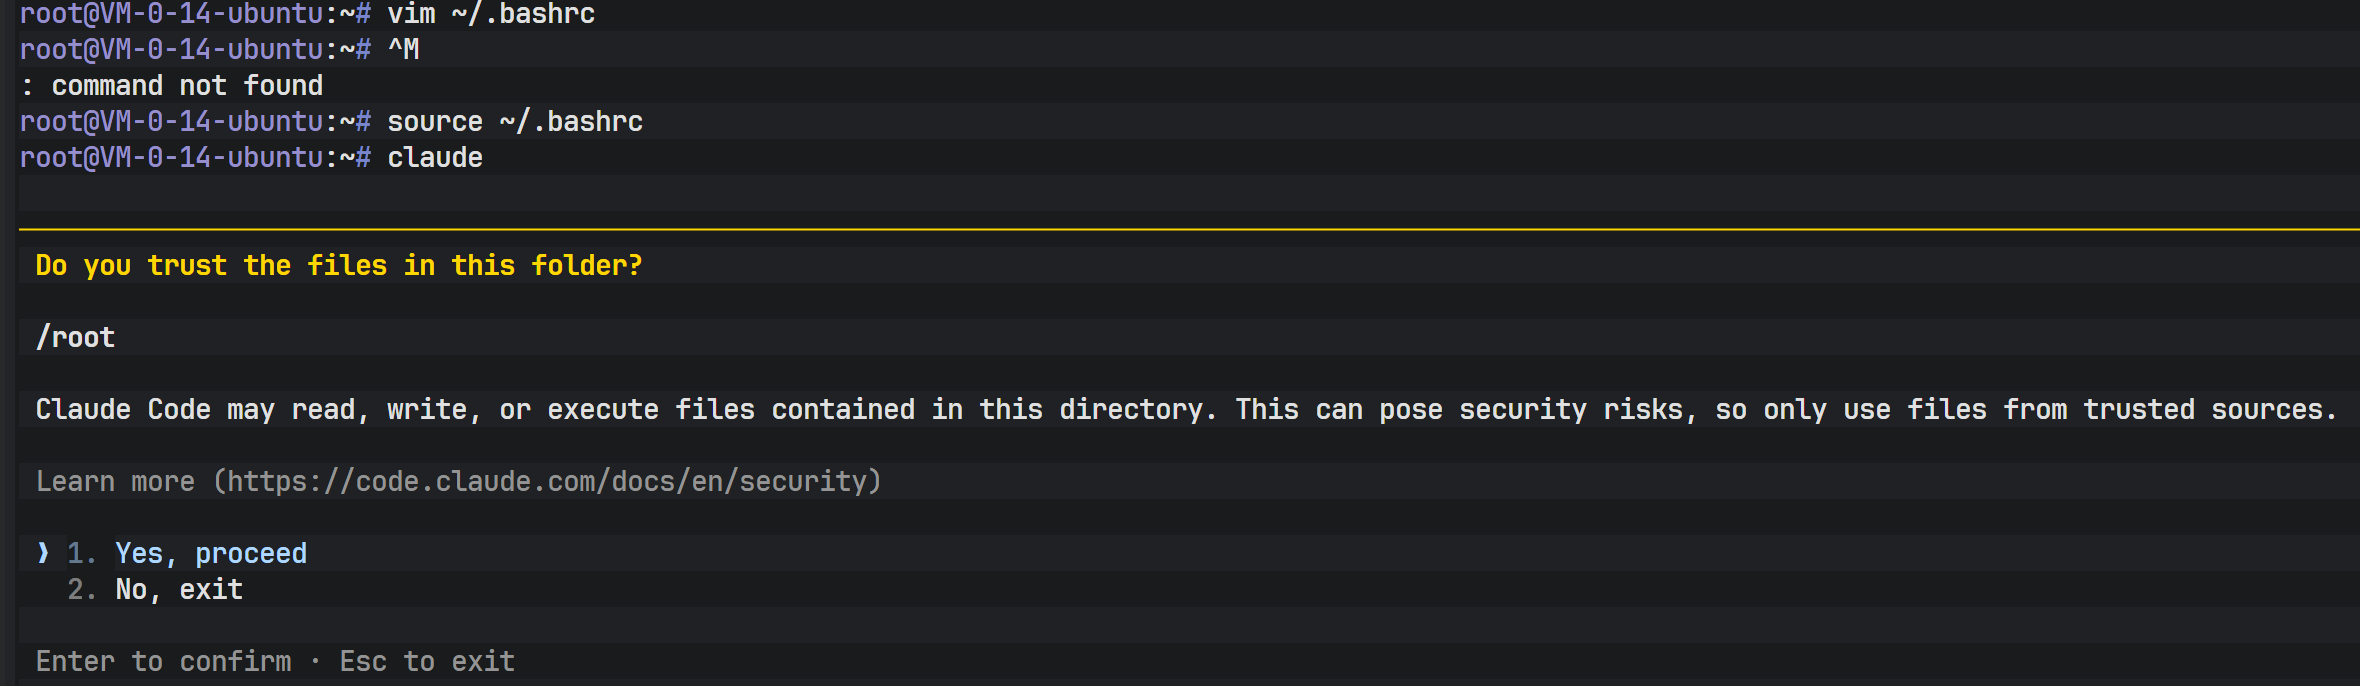
source ~/.bashrc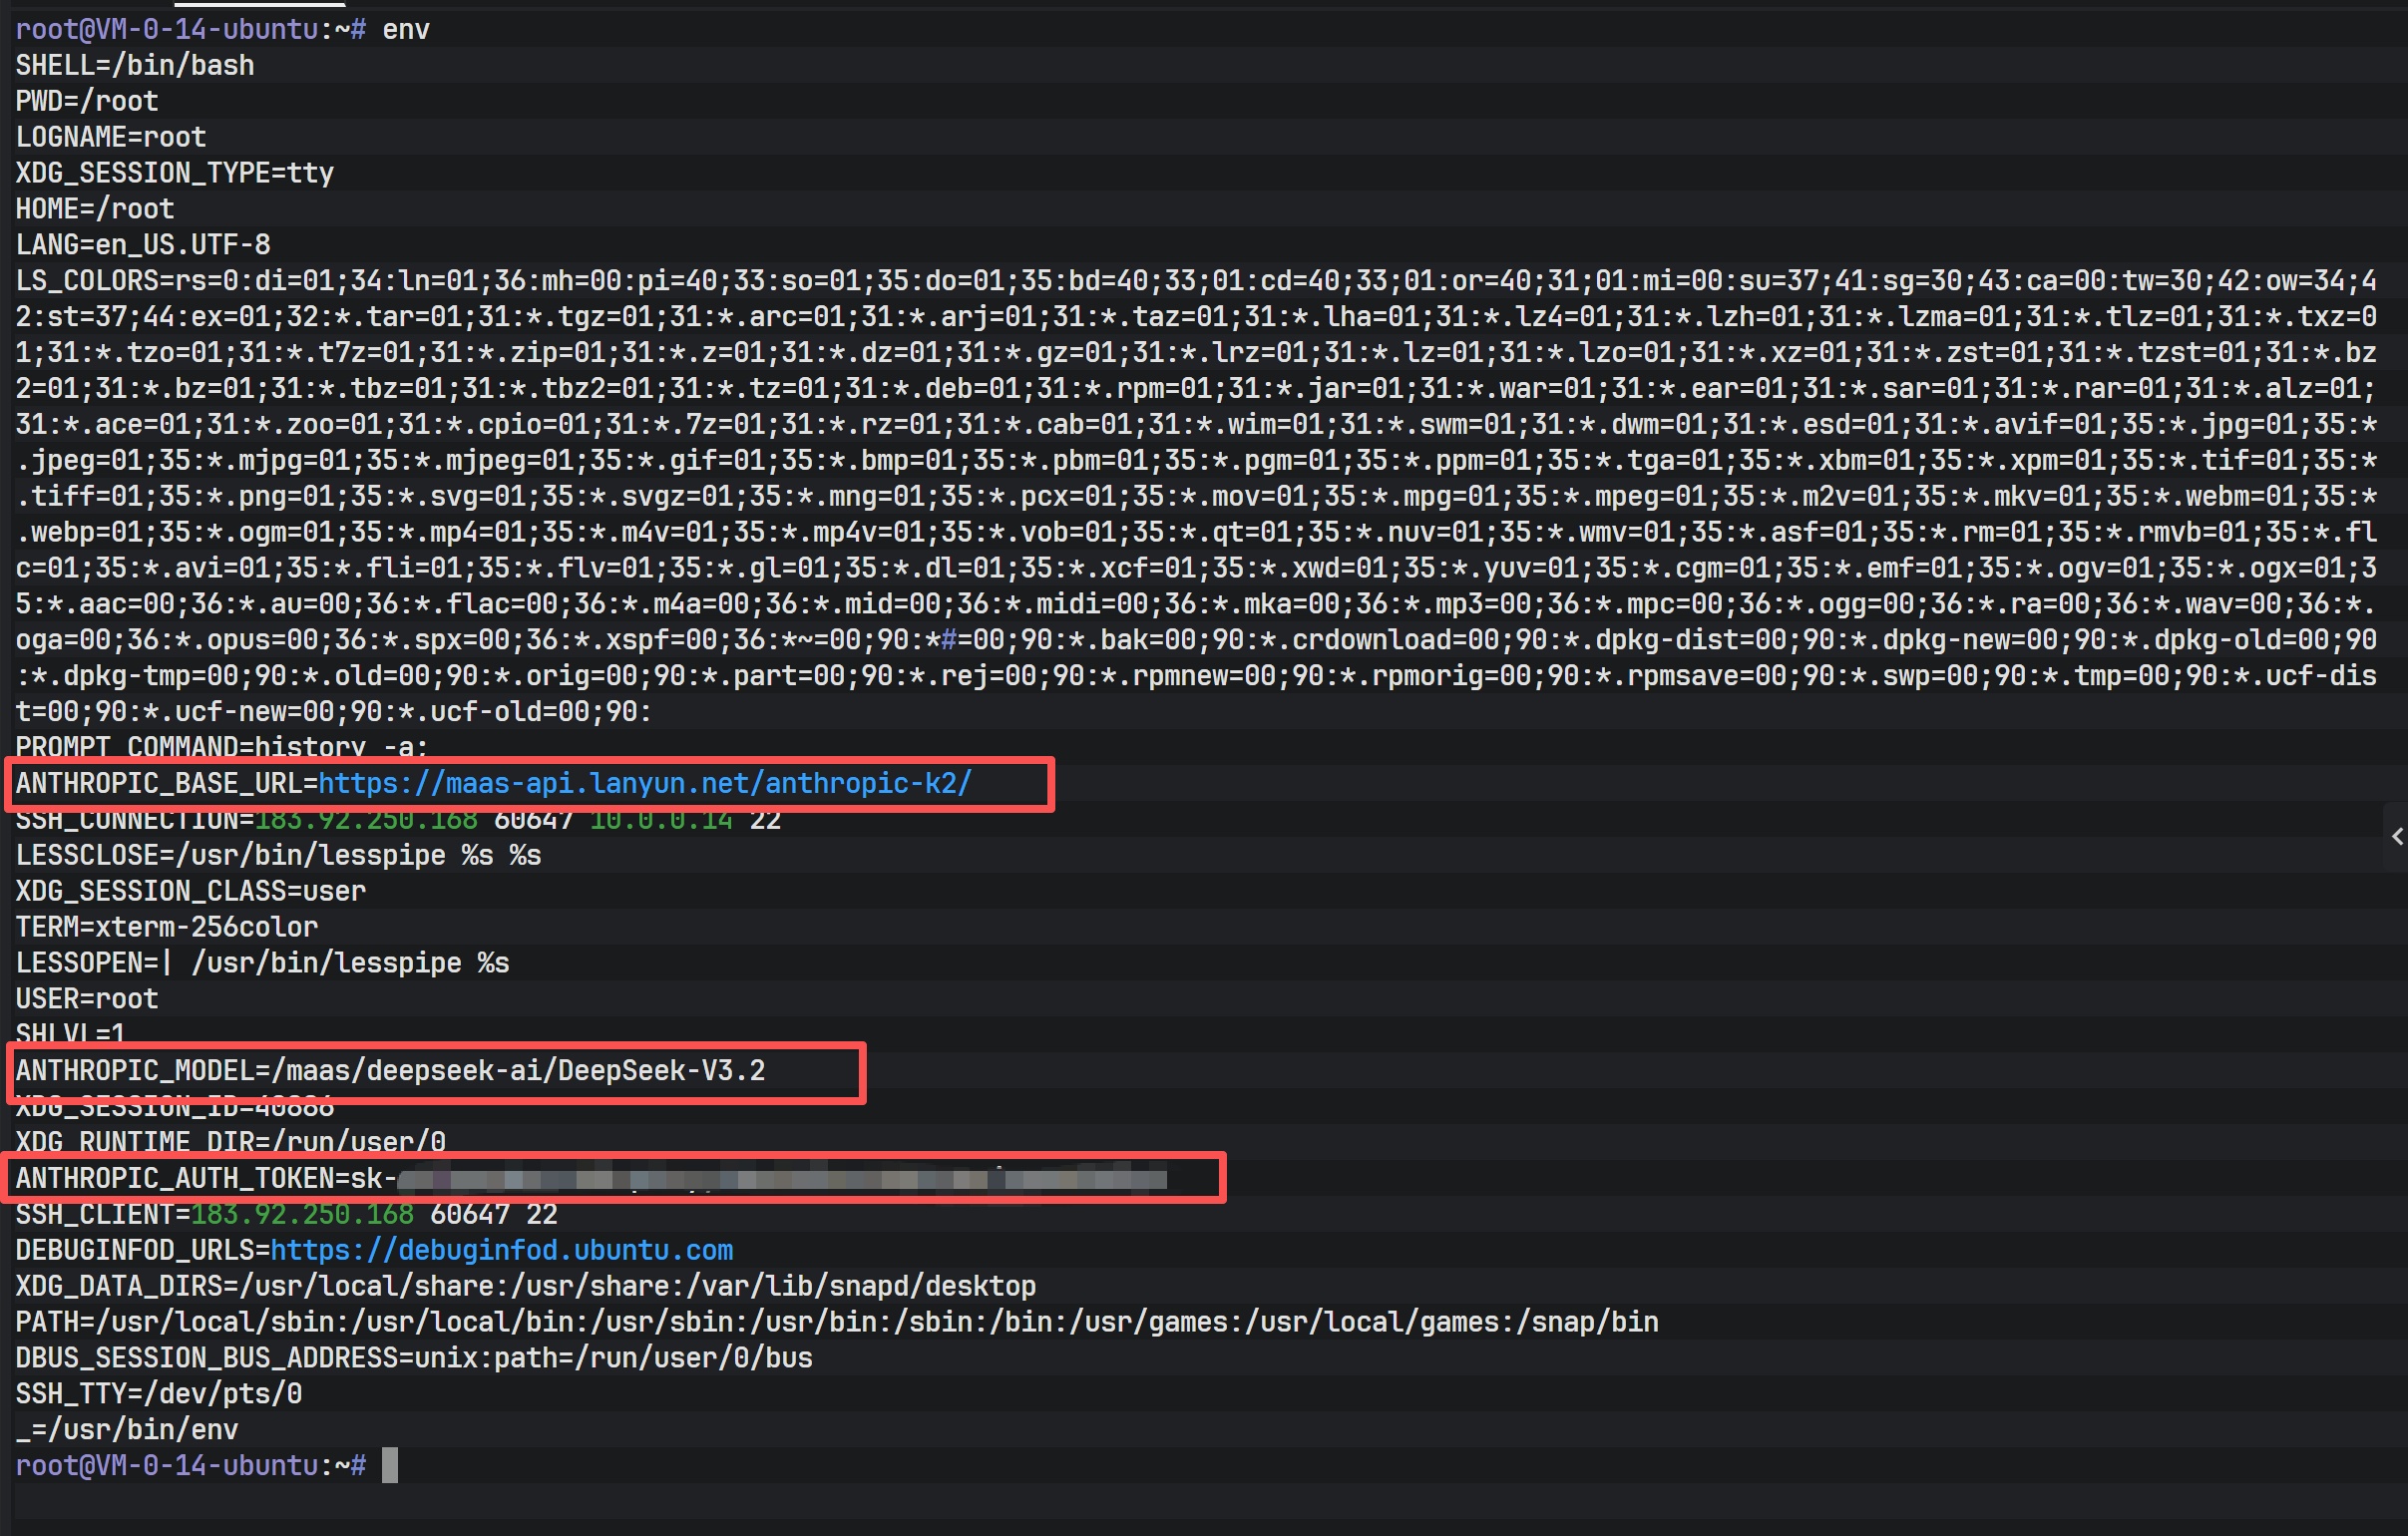
As shown above, the env command output confirms that the ANTHROPIC_* variables are present and correctly set. At this point, Claude Code has all the necessary prerequisites to communicate with the backend service.
Running claude again now successfully connects to DeepSeek V3.2 and enters interactive mode.
After a successful connection, you can view the currently configured model information using built-in commands.
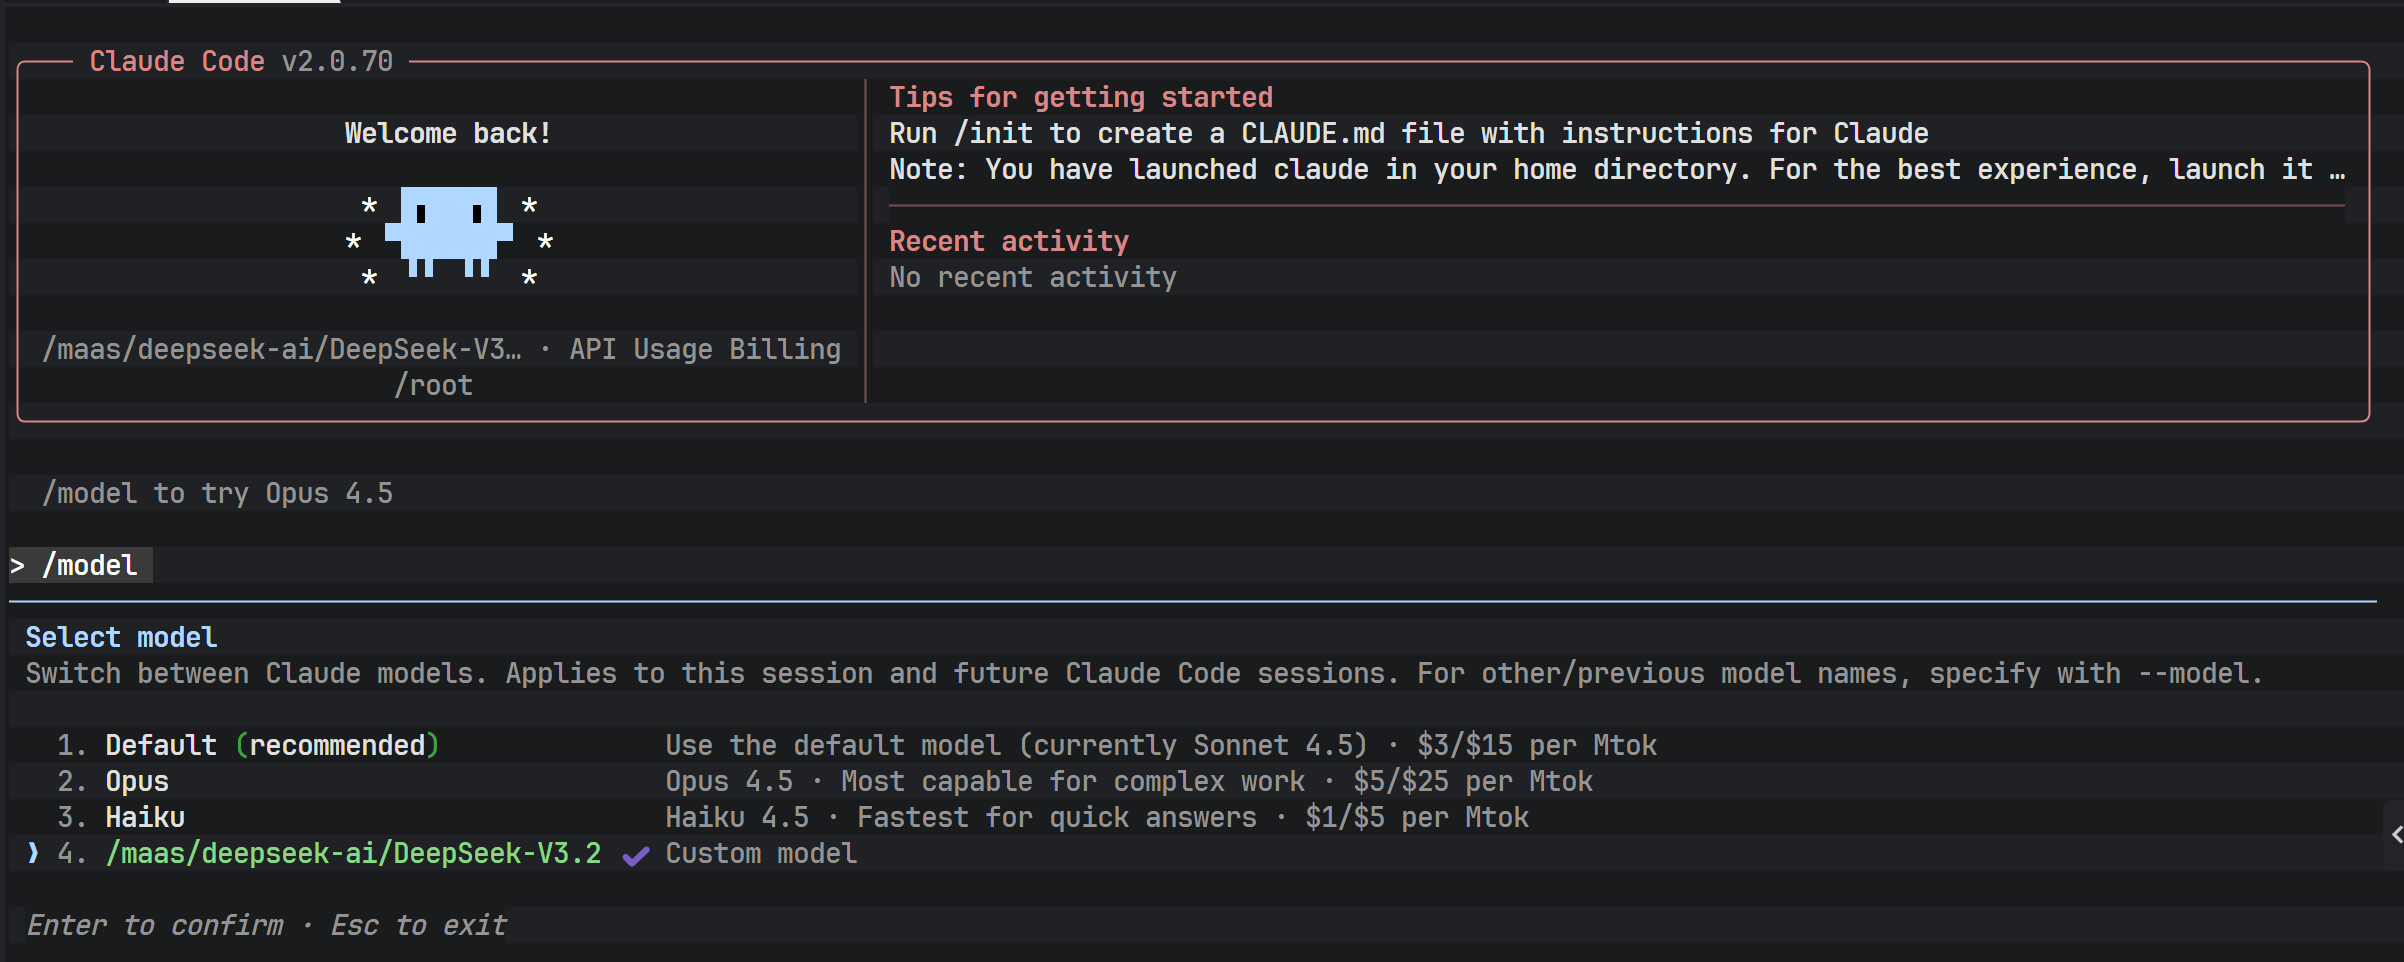
Confirming that the model identifier matches the configuration file indicates that the API routing has been successfully directed to DeepSeek V3.2.
Phase 5: Implementing an Automated Deployment Script
When deploying across multiple servers or environments, repeated manual configuration is inefficient and error-prone. Writing an automated installation script is therefore a best practice in engineering.
A complete installation script typically includes the following capabilities:
- Detecting the operating system type
- Checking whether Node.js exists and whether the version meets requirements
- Automatically installing or upgrading Node.js
- Checking whether Claude Code is already installed
- Securely reading the API key (without echoing input)
- Idempotently modifying the shell configuration file
./install.shAfter running the script, the user only needs to enter the API key as prompted to complete the entire environment setup.
The image above shows the interactive interface when running the installation script. The script automatically detects the Node.js environment and skips redundant installation, then prompts the user to enter the API key.
Phase 6: Terminal AI Agent Development and API Testing
With the environment ready, it is time for hands-on practice. At this stage, Claude Code can act as a “development agent,” generating code and executing system operations directly from natural language instructions.
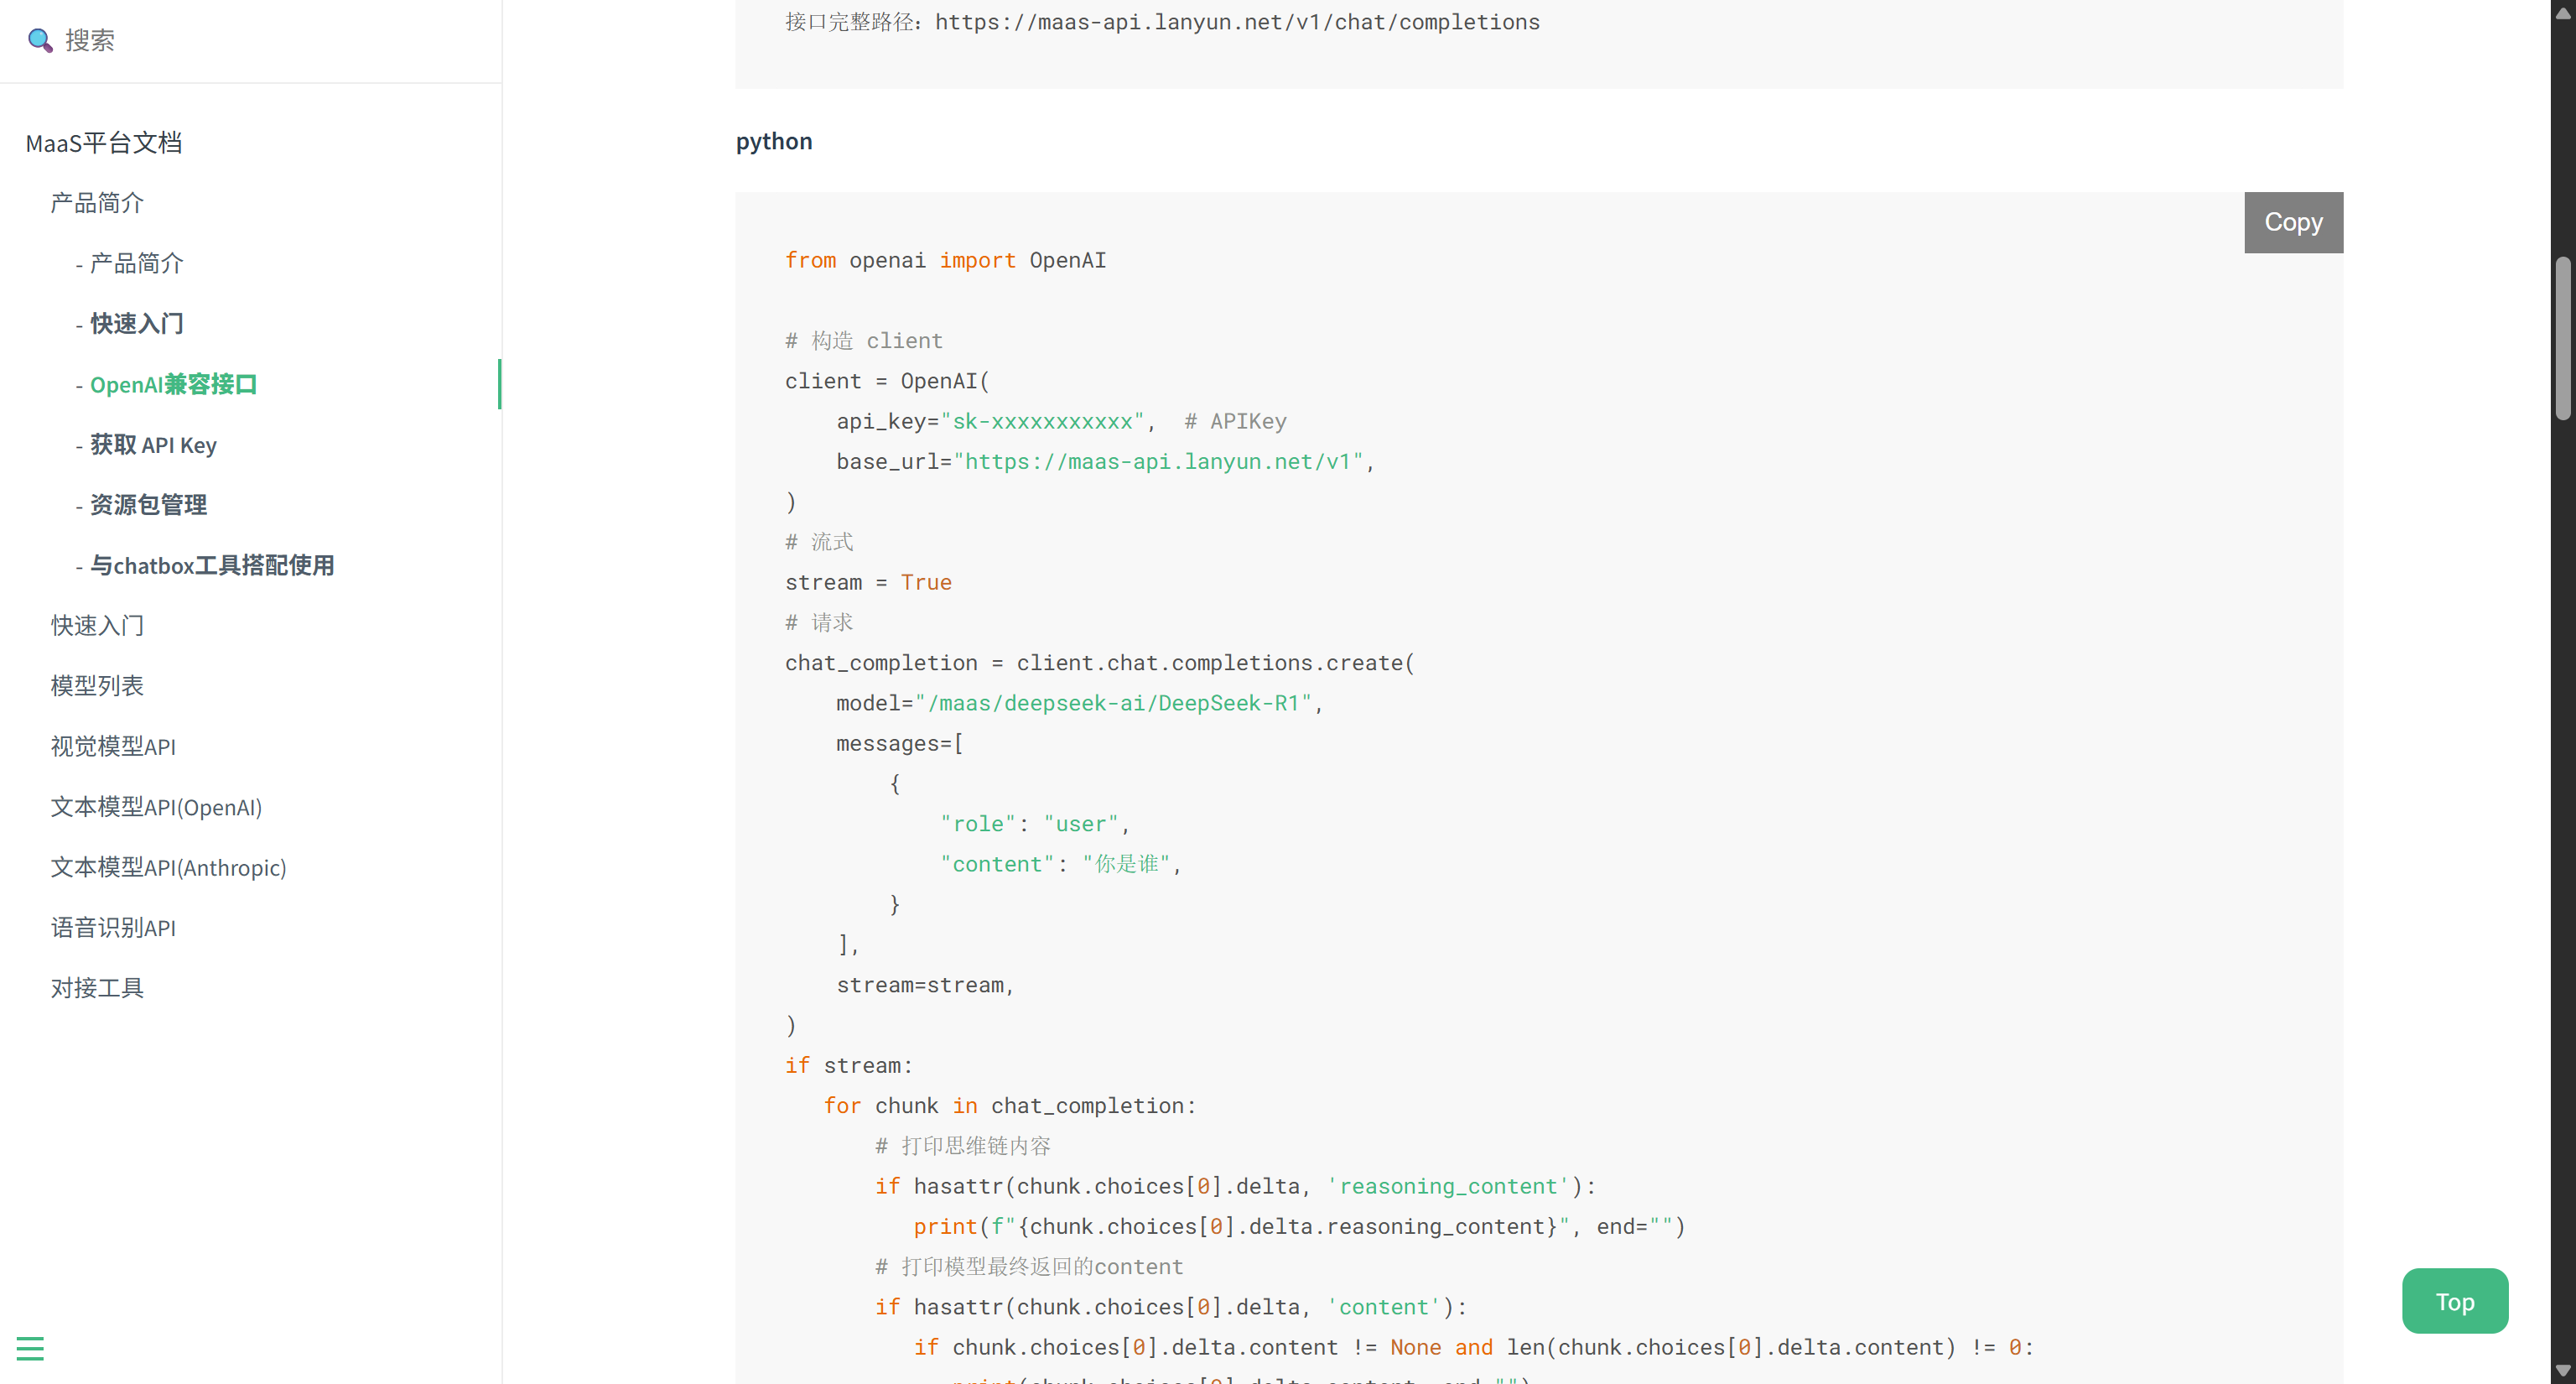
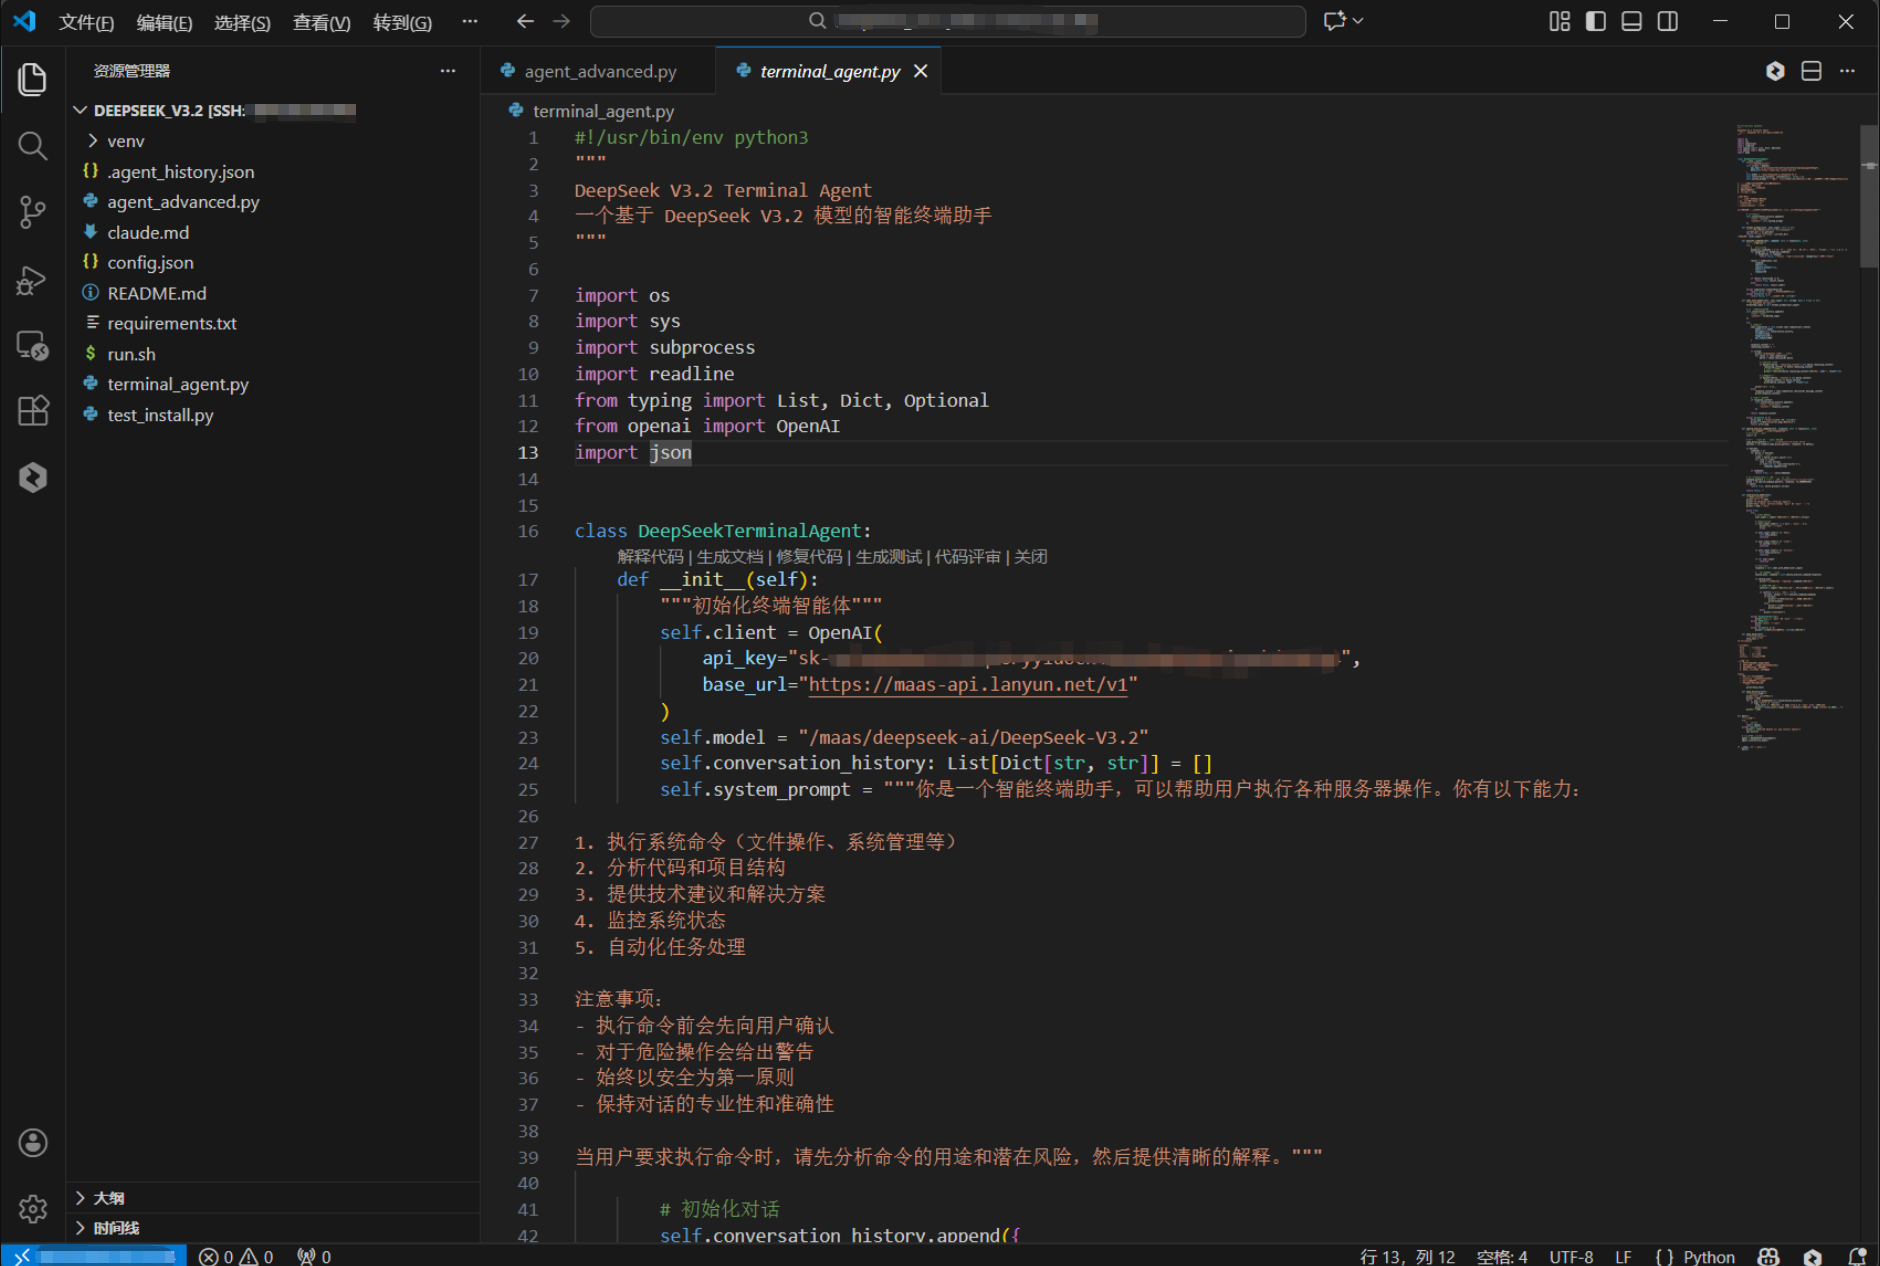
To validate the capabilities of DeepSeek V3.2, you can build a terminal AI agent based on the OpenAI Python SDK.
from openai import OpenAI

client = OpenAI(
    api_key="sk-xxxxxxxx",
    base_url="https://maas-api.lanyun.net/v1",
)

chat_completion = client.chat.completions.create(
    model="/maas/deepseek-ai/DeepSeek-V3.2",
    messages=[
        {"role": "user", "content": "Who are you"}
    ],
    stream=True,
)

for chunk in chat_completion:
    if hasattr(chunk.choices[0].delta, 'reasoning_content'):
        print(chunk.choices[0].delta.reasoning_content, end="")
    if hasattr(chunk.choices[0].delta, 'content'):
        print(chunk.choices[0].delta.content or "", end="")
This example demonstrates how to handle streaming responses, allowing real-time output of both the model’s reasoning process and final answer. It is ideal for building low-latency, highly interactive terminal AI tools.
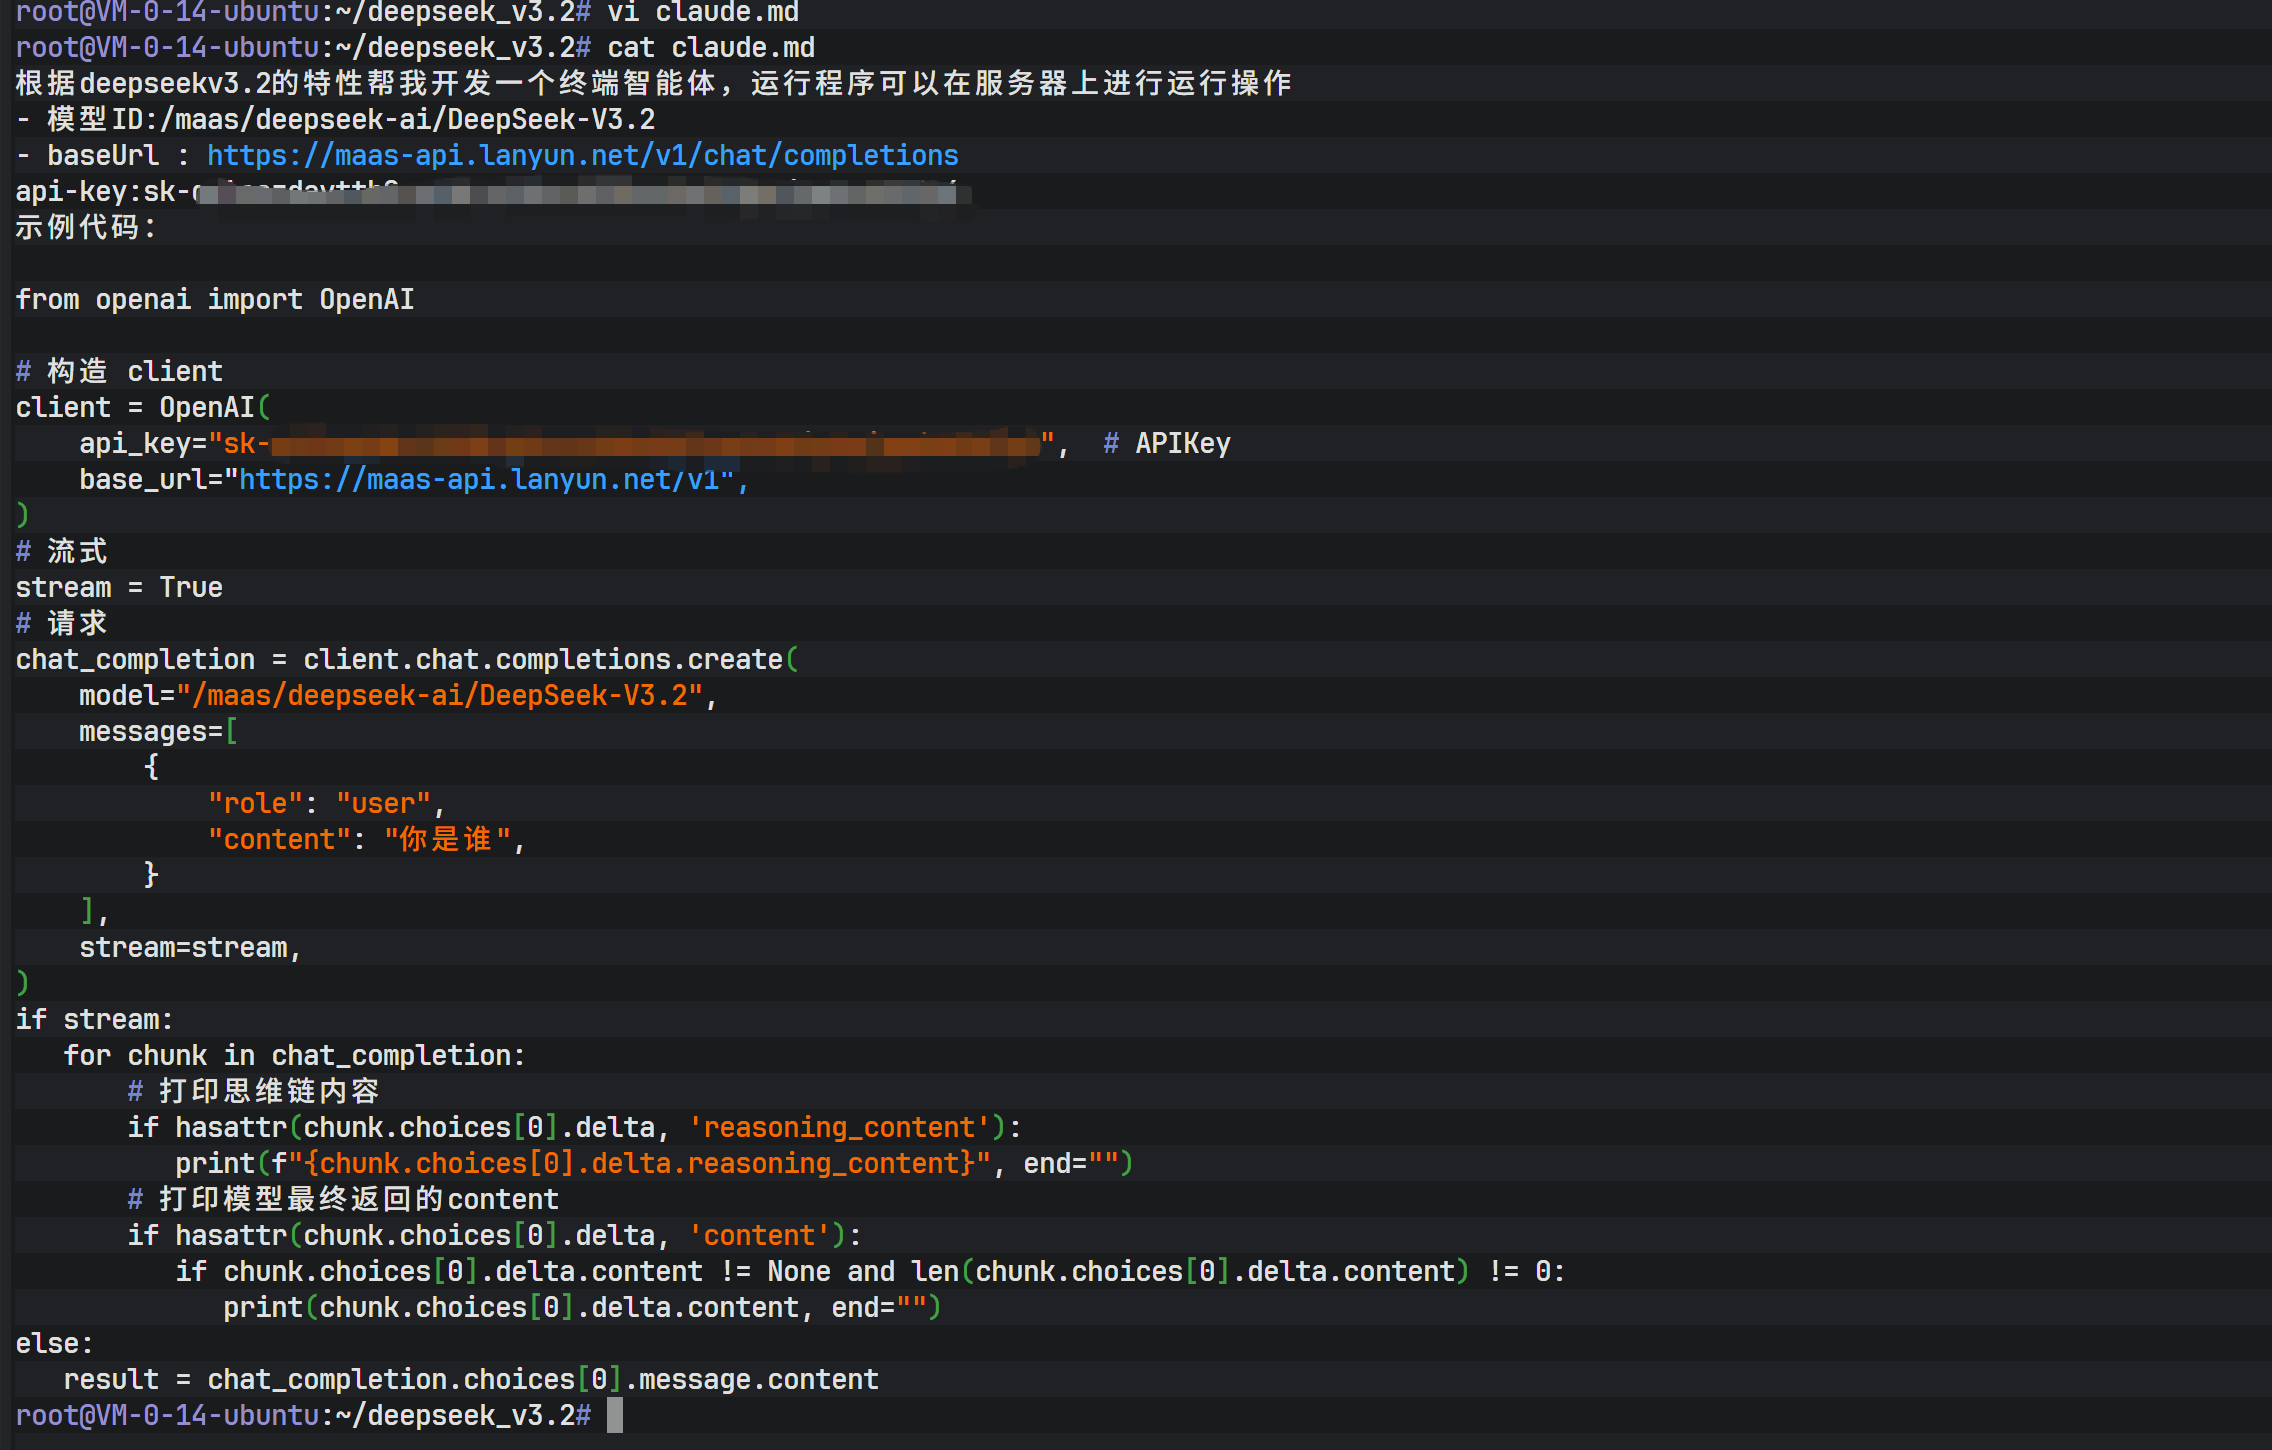
The image above shows the initial state after passing a requirements document to Claude Code. Through natural language interaction, Claude Code is instructed to generate actual code files based on the document.
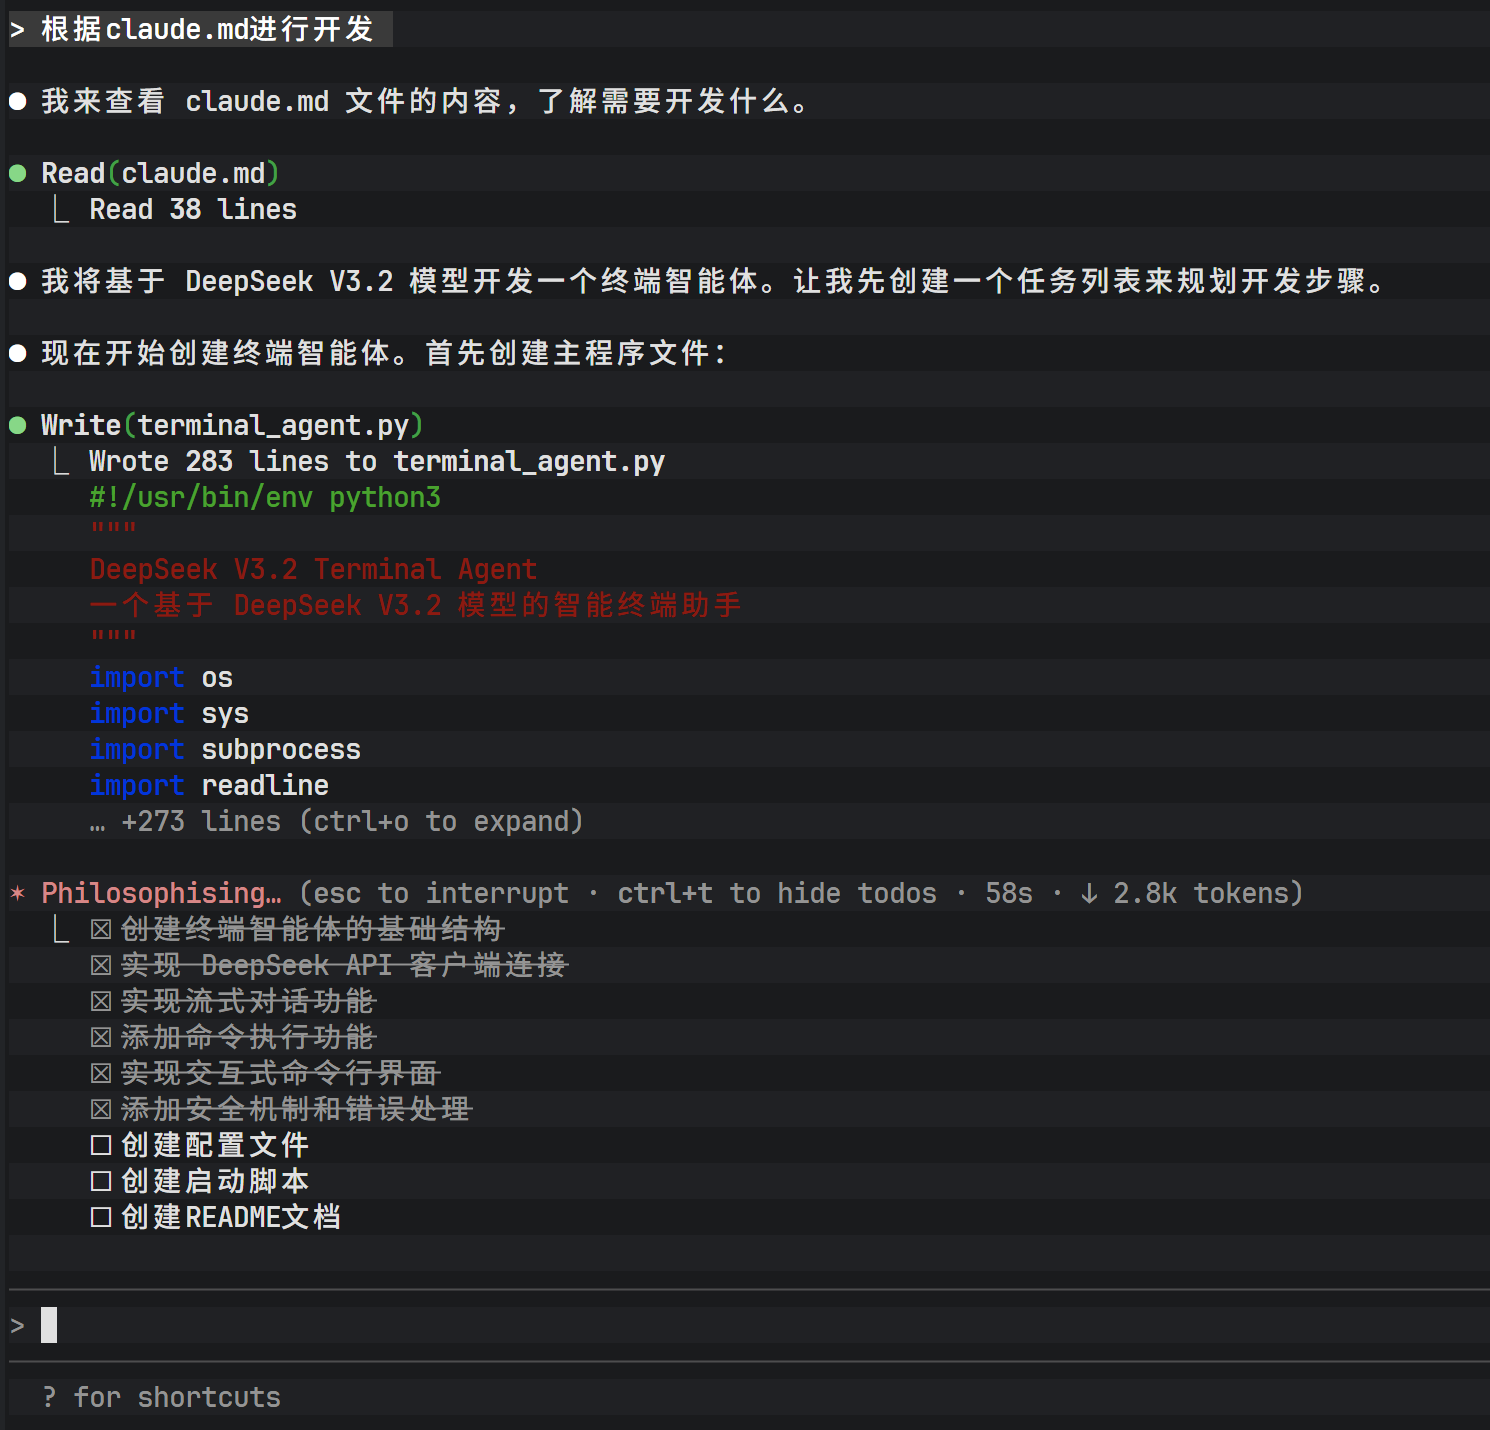
During the interaction, Claude Code analyzes the requirements and lists the files it plans to create. After user confirmation (entering Yes), the tool begins generating code in the filesystem.
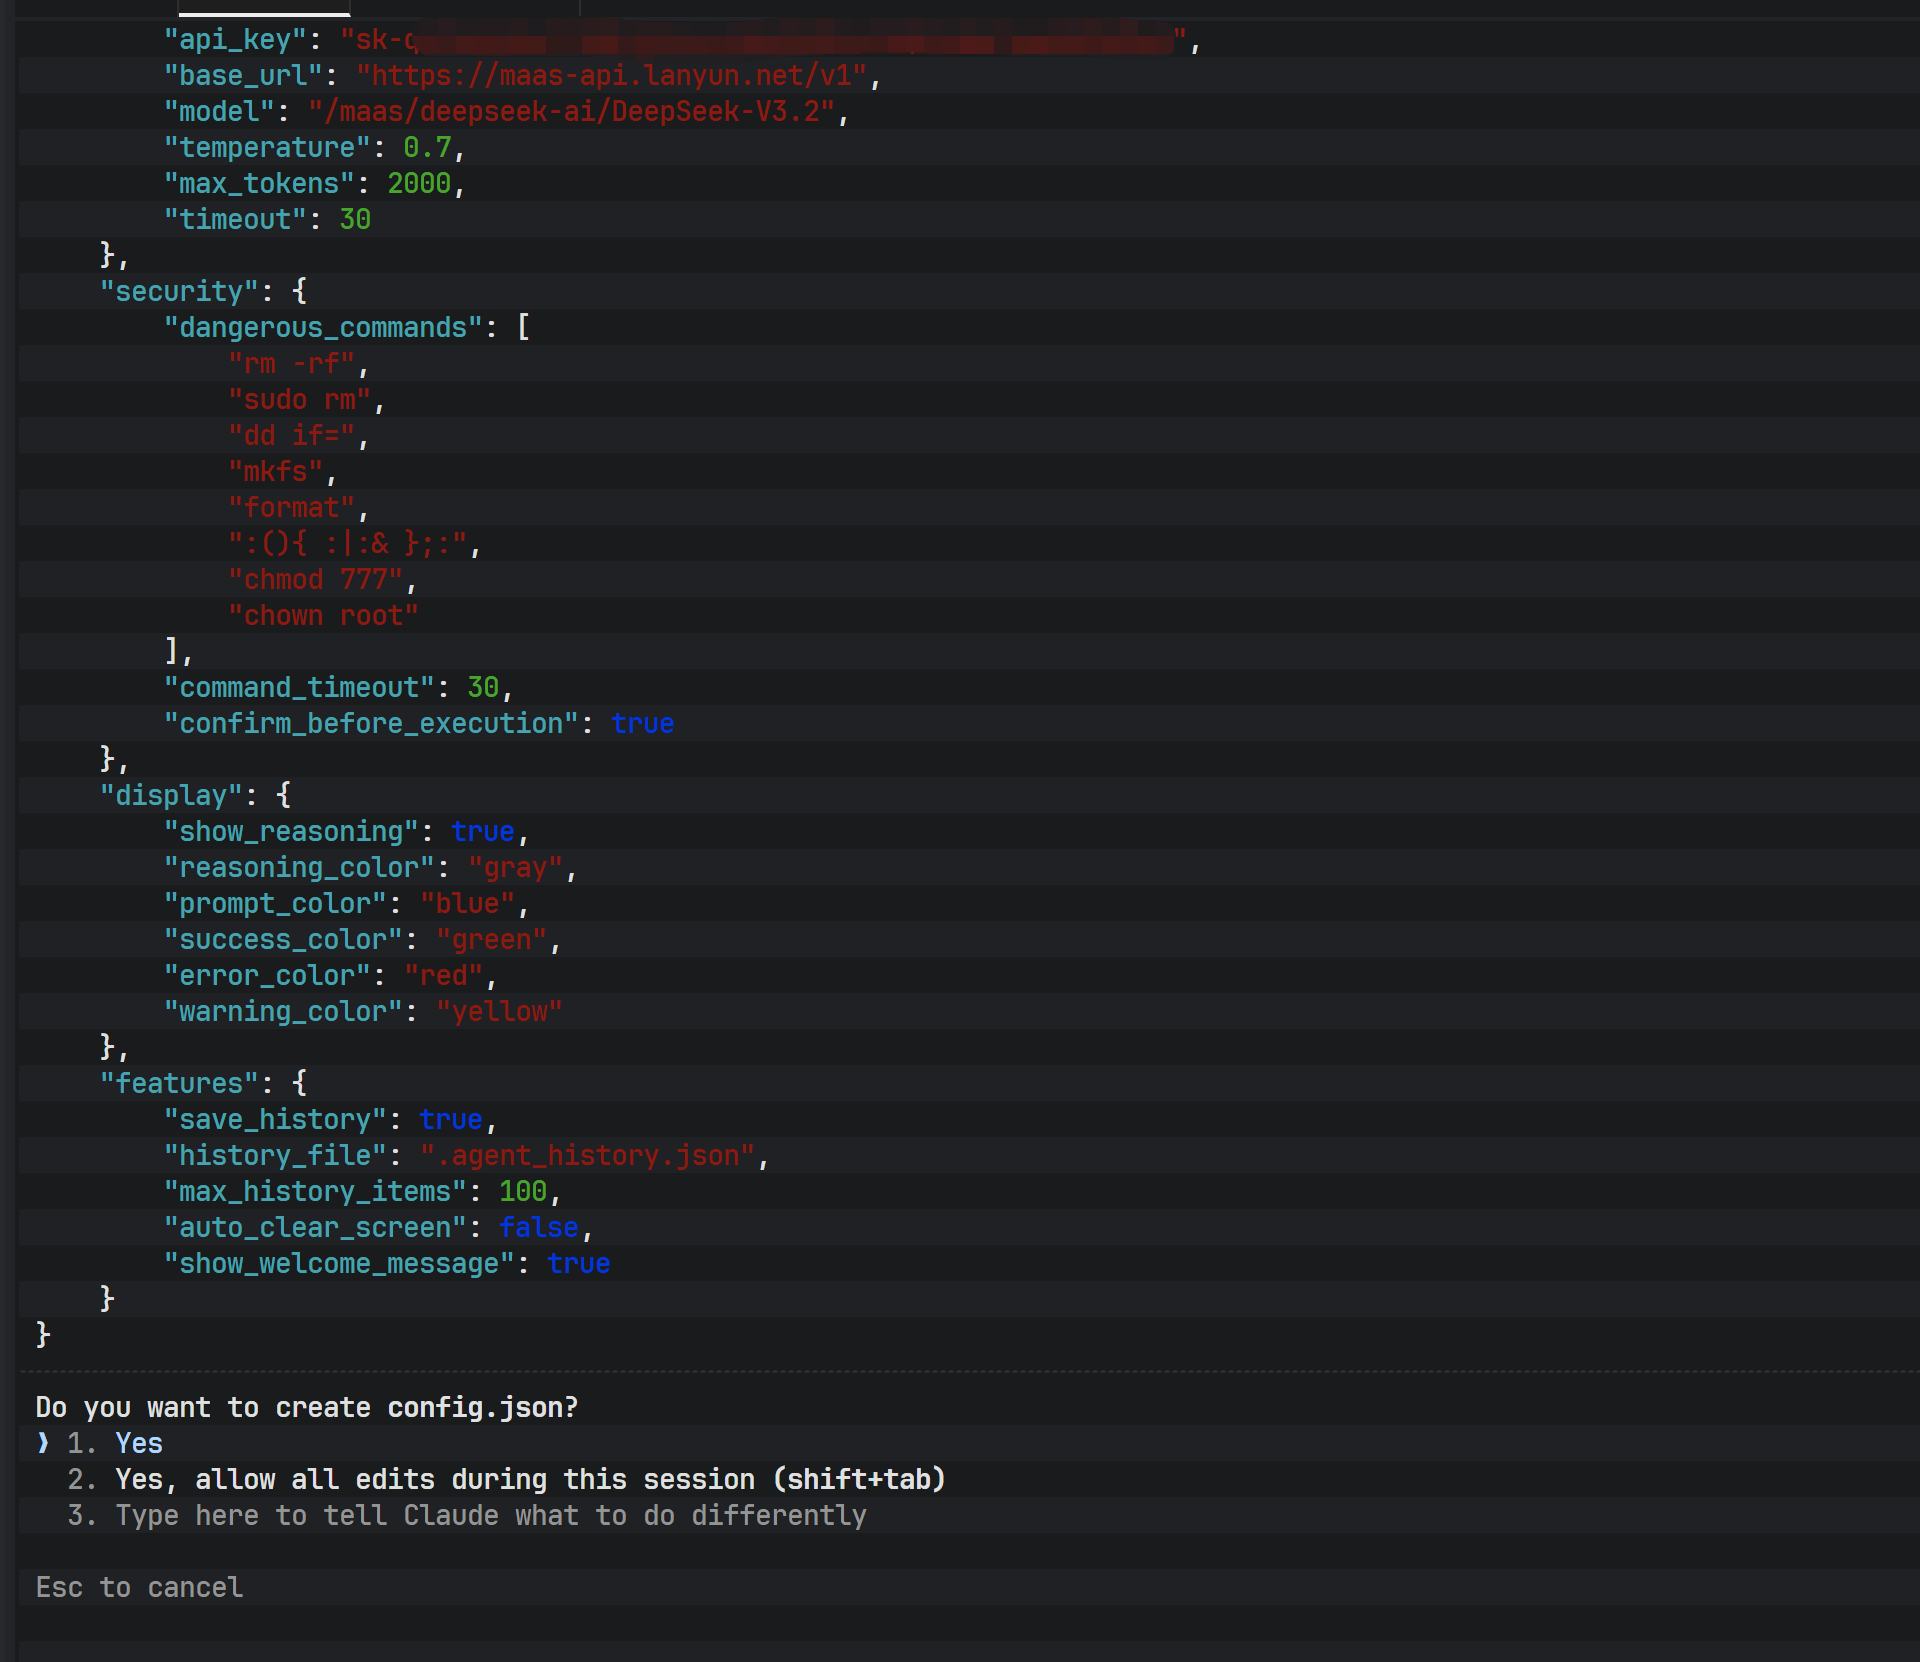
After generation is complete, the main Python code file is written to disk. At this point, the DeepSeek model has not only generated the core logic but also inferred and created auxiliary files based on context.

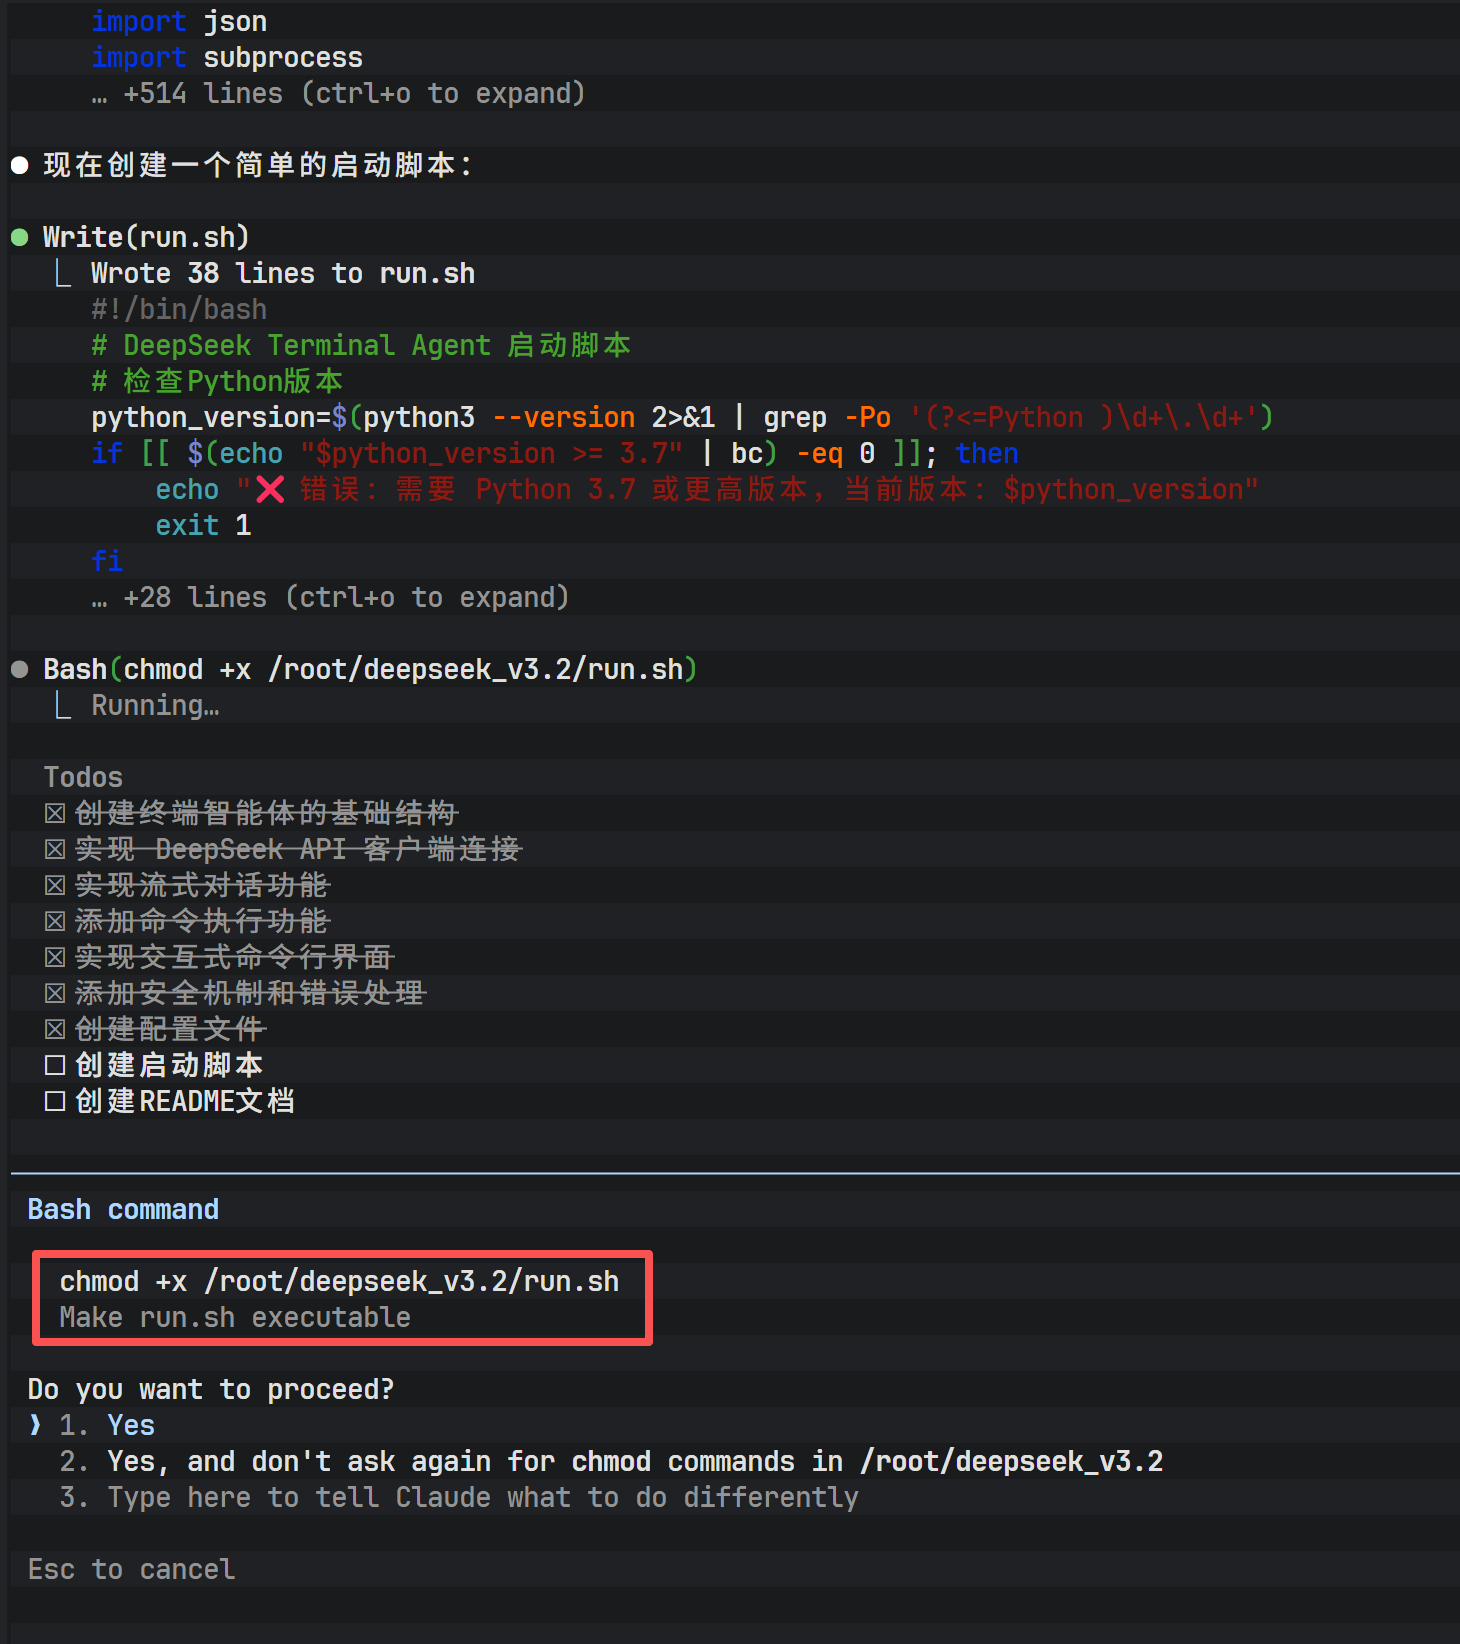
To make the generated script executable, file permissions usually need to be modified. Claude Code can execute shell commands directly, handling operations like chmod.
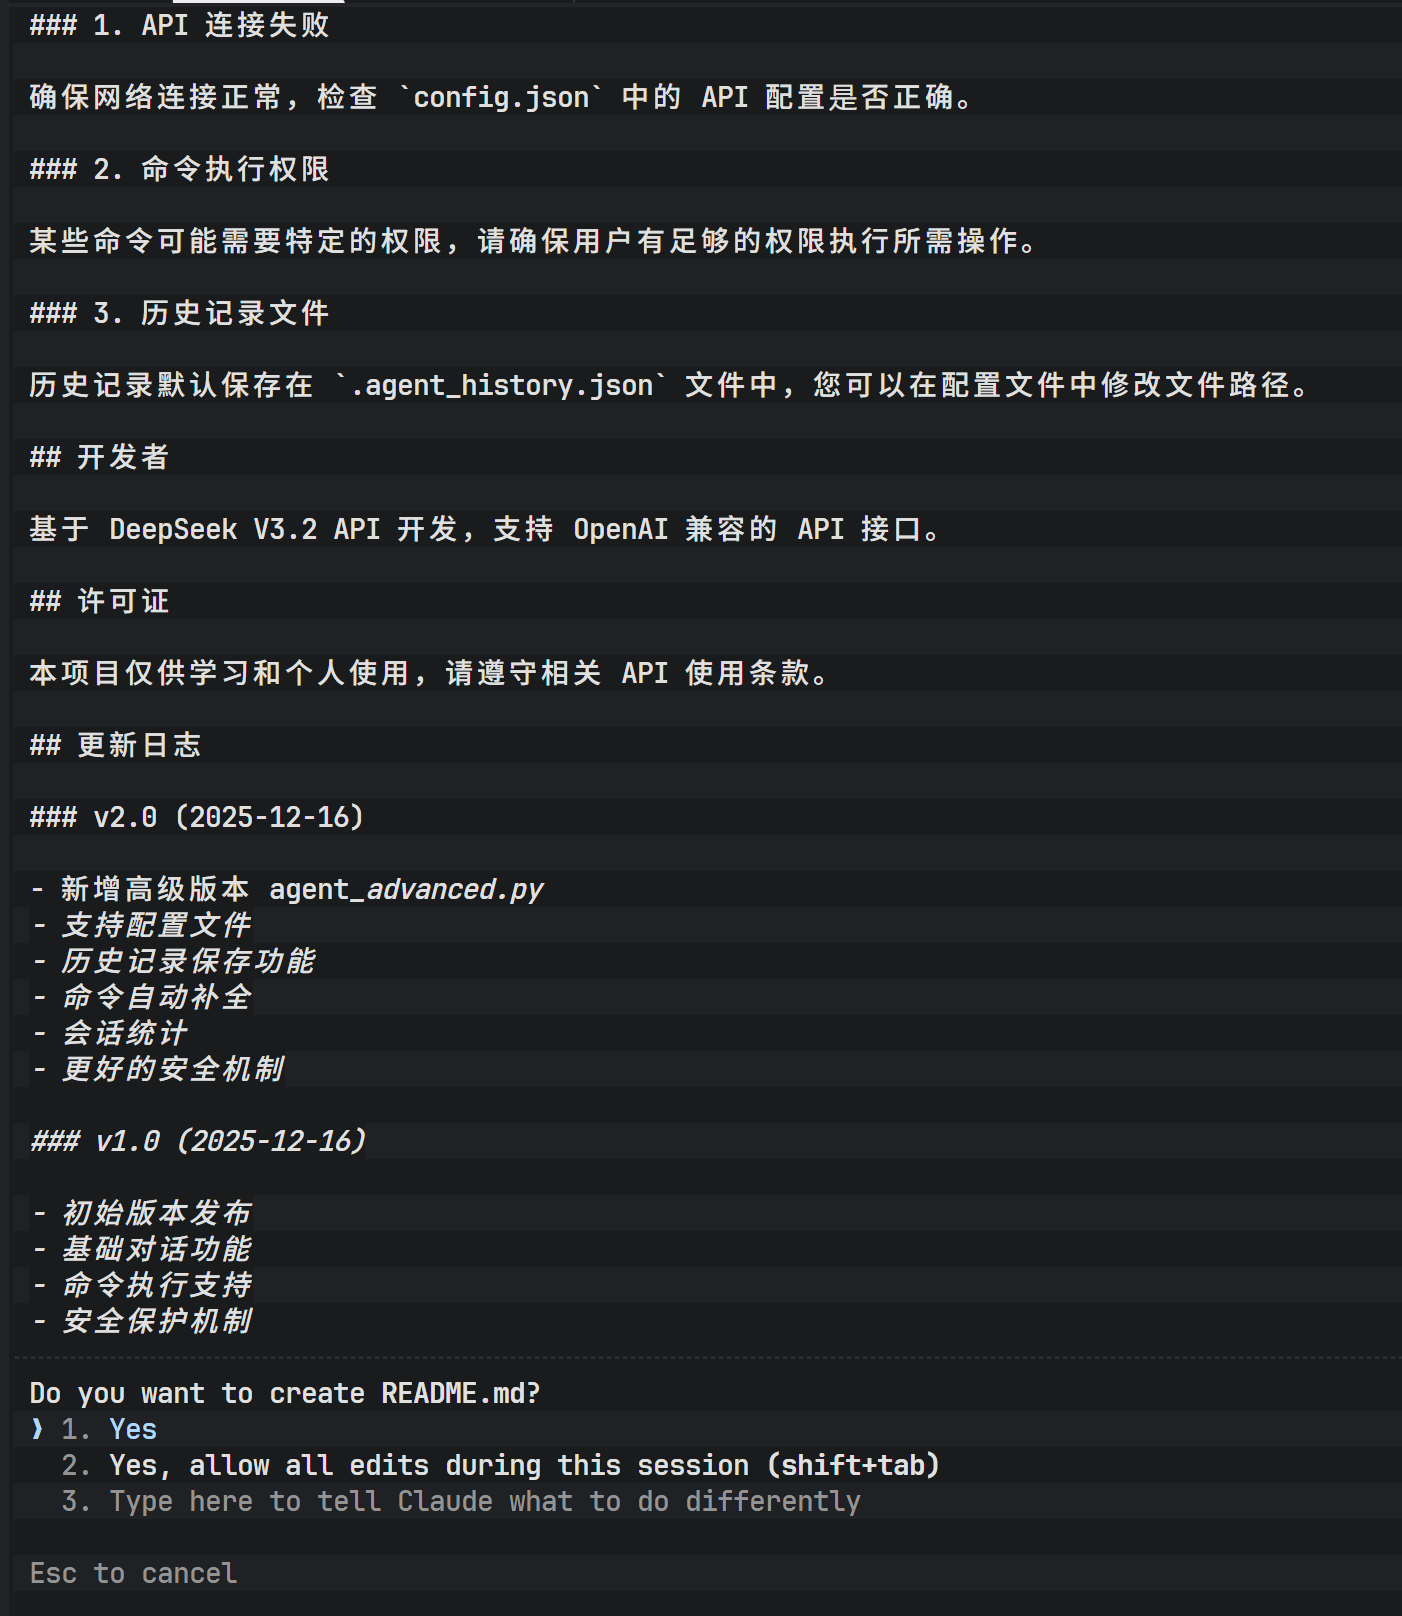
In addition, a complete project requires documentation. By instructing Claude Code to generate a README.md file, it automatically produces project descriptions, installation steps, and usage instructions based on the code logic.
The entire execution flow demonstrates extremely high responsiveness, thanks to the low-latency characteristics of the Lanyun API and the efficient reasoning capabilities of the DeepSeek model.
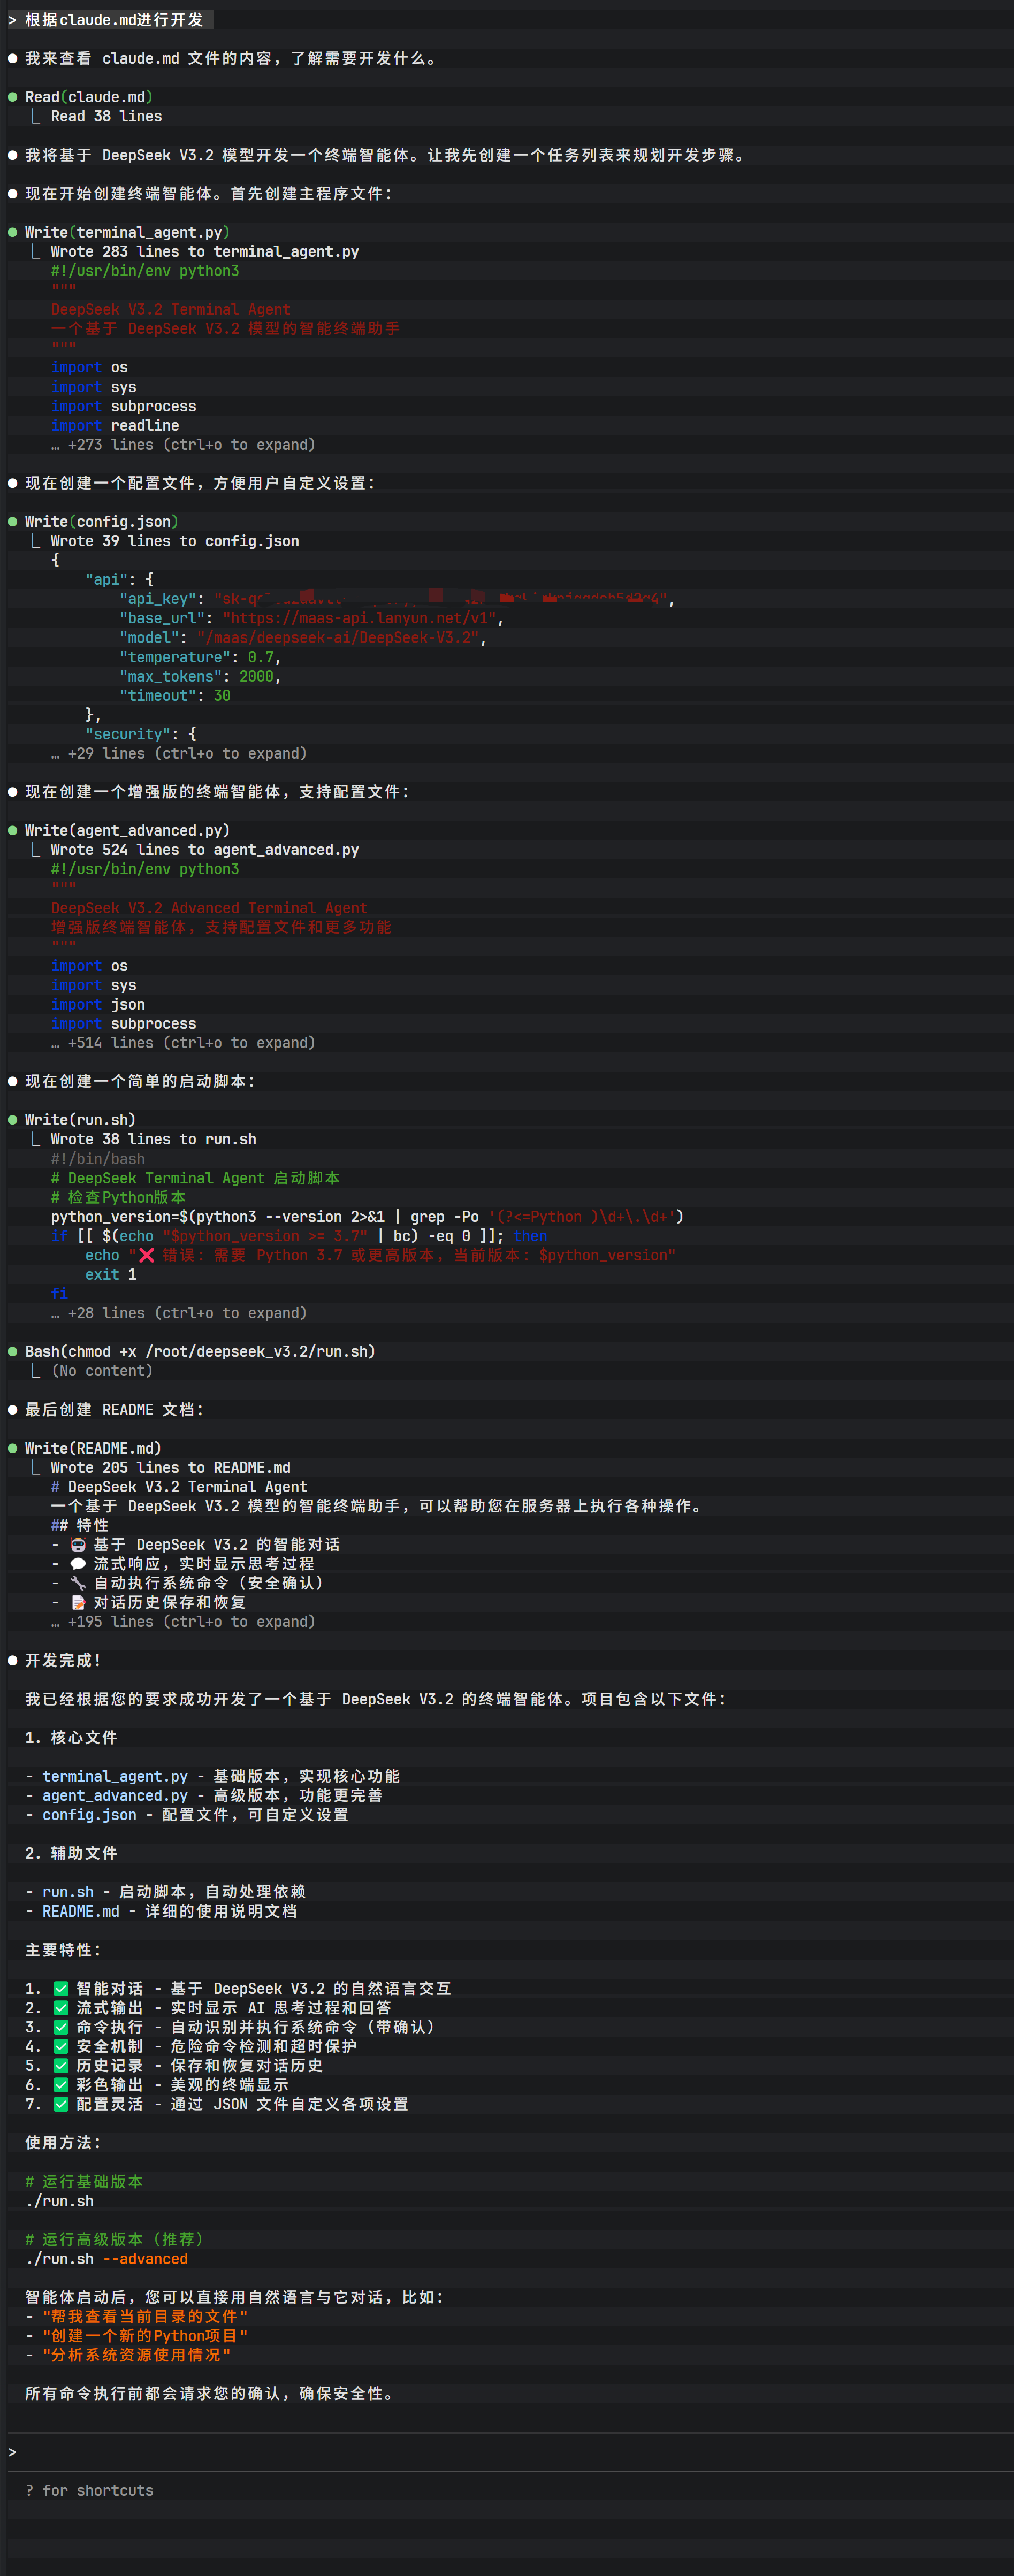
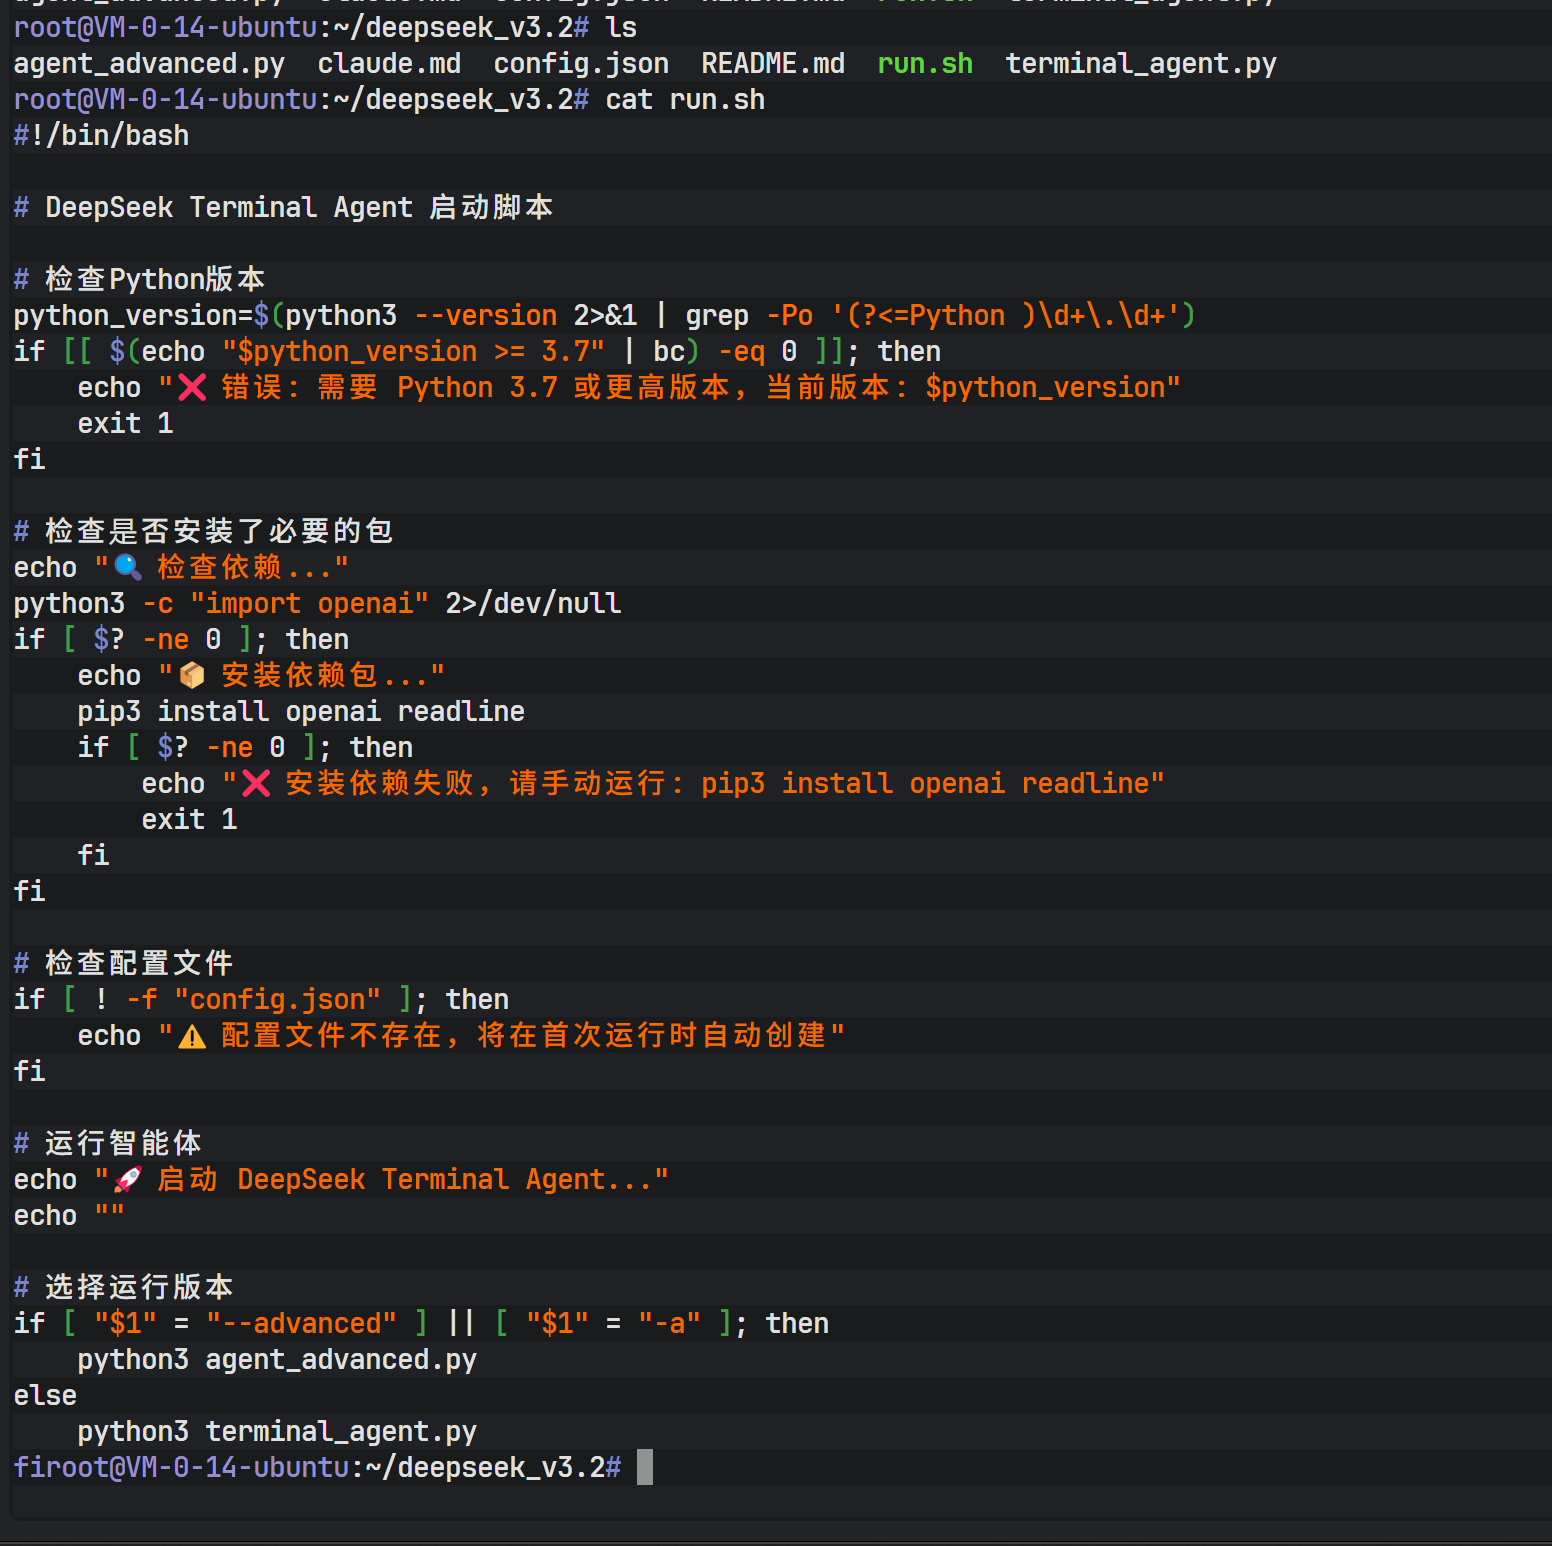
Within the project directory, you can find the generated run.sh startup script, which serves as a packaged entry point for launching the newly created AI agent program.
Phase 7: Running and Extending the Terminal AI Agent
Before running the generated Python program, make sure the required dependencies are installed:
apt install python3-pip
pip install openai readline
After launch, the terminal AI agent provides a chat-like interactive interface, but it can do far more than just “talk”:
- Generate and modify code files
- Execute shell commands
- Analyze compilation or runtime errors and automatically fix them
- Complete creative writing and script generation tasks
If dependency installation errors occur, you can again leverage Claude Code to analyze error logs and automatically execute fix commands. This “AI fixing the AI environment” model greatly lowers the operations barrier.
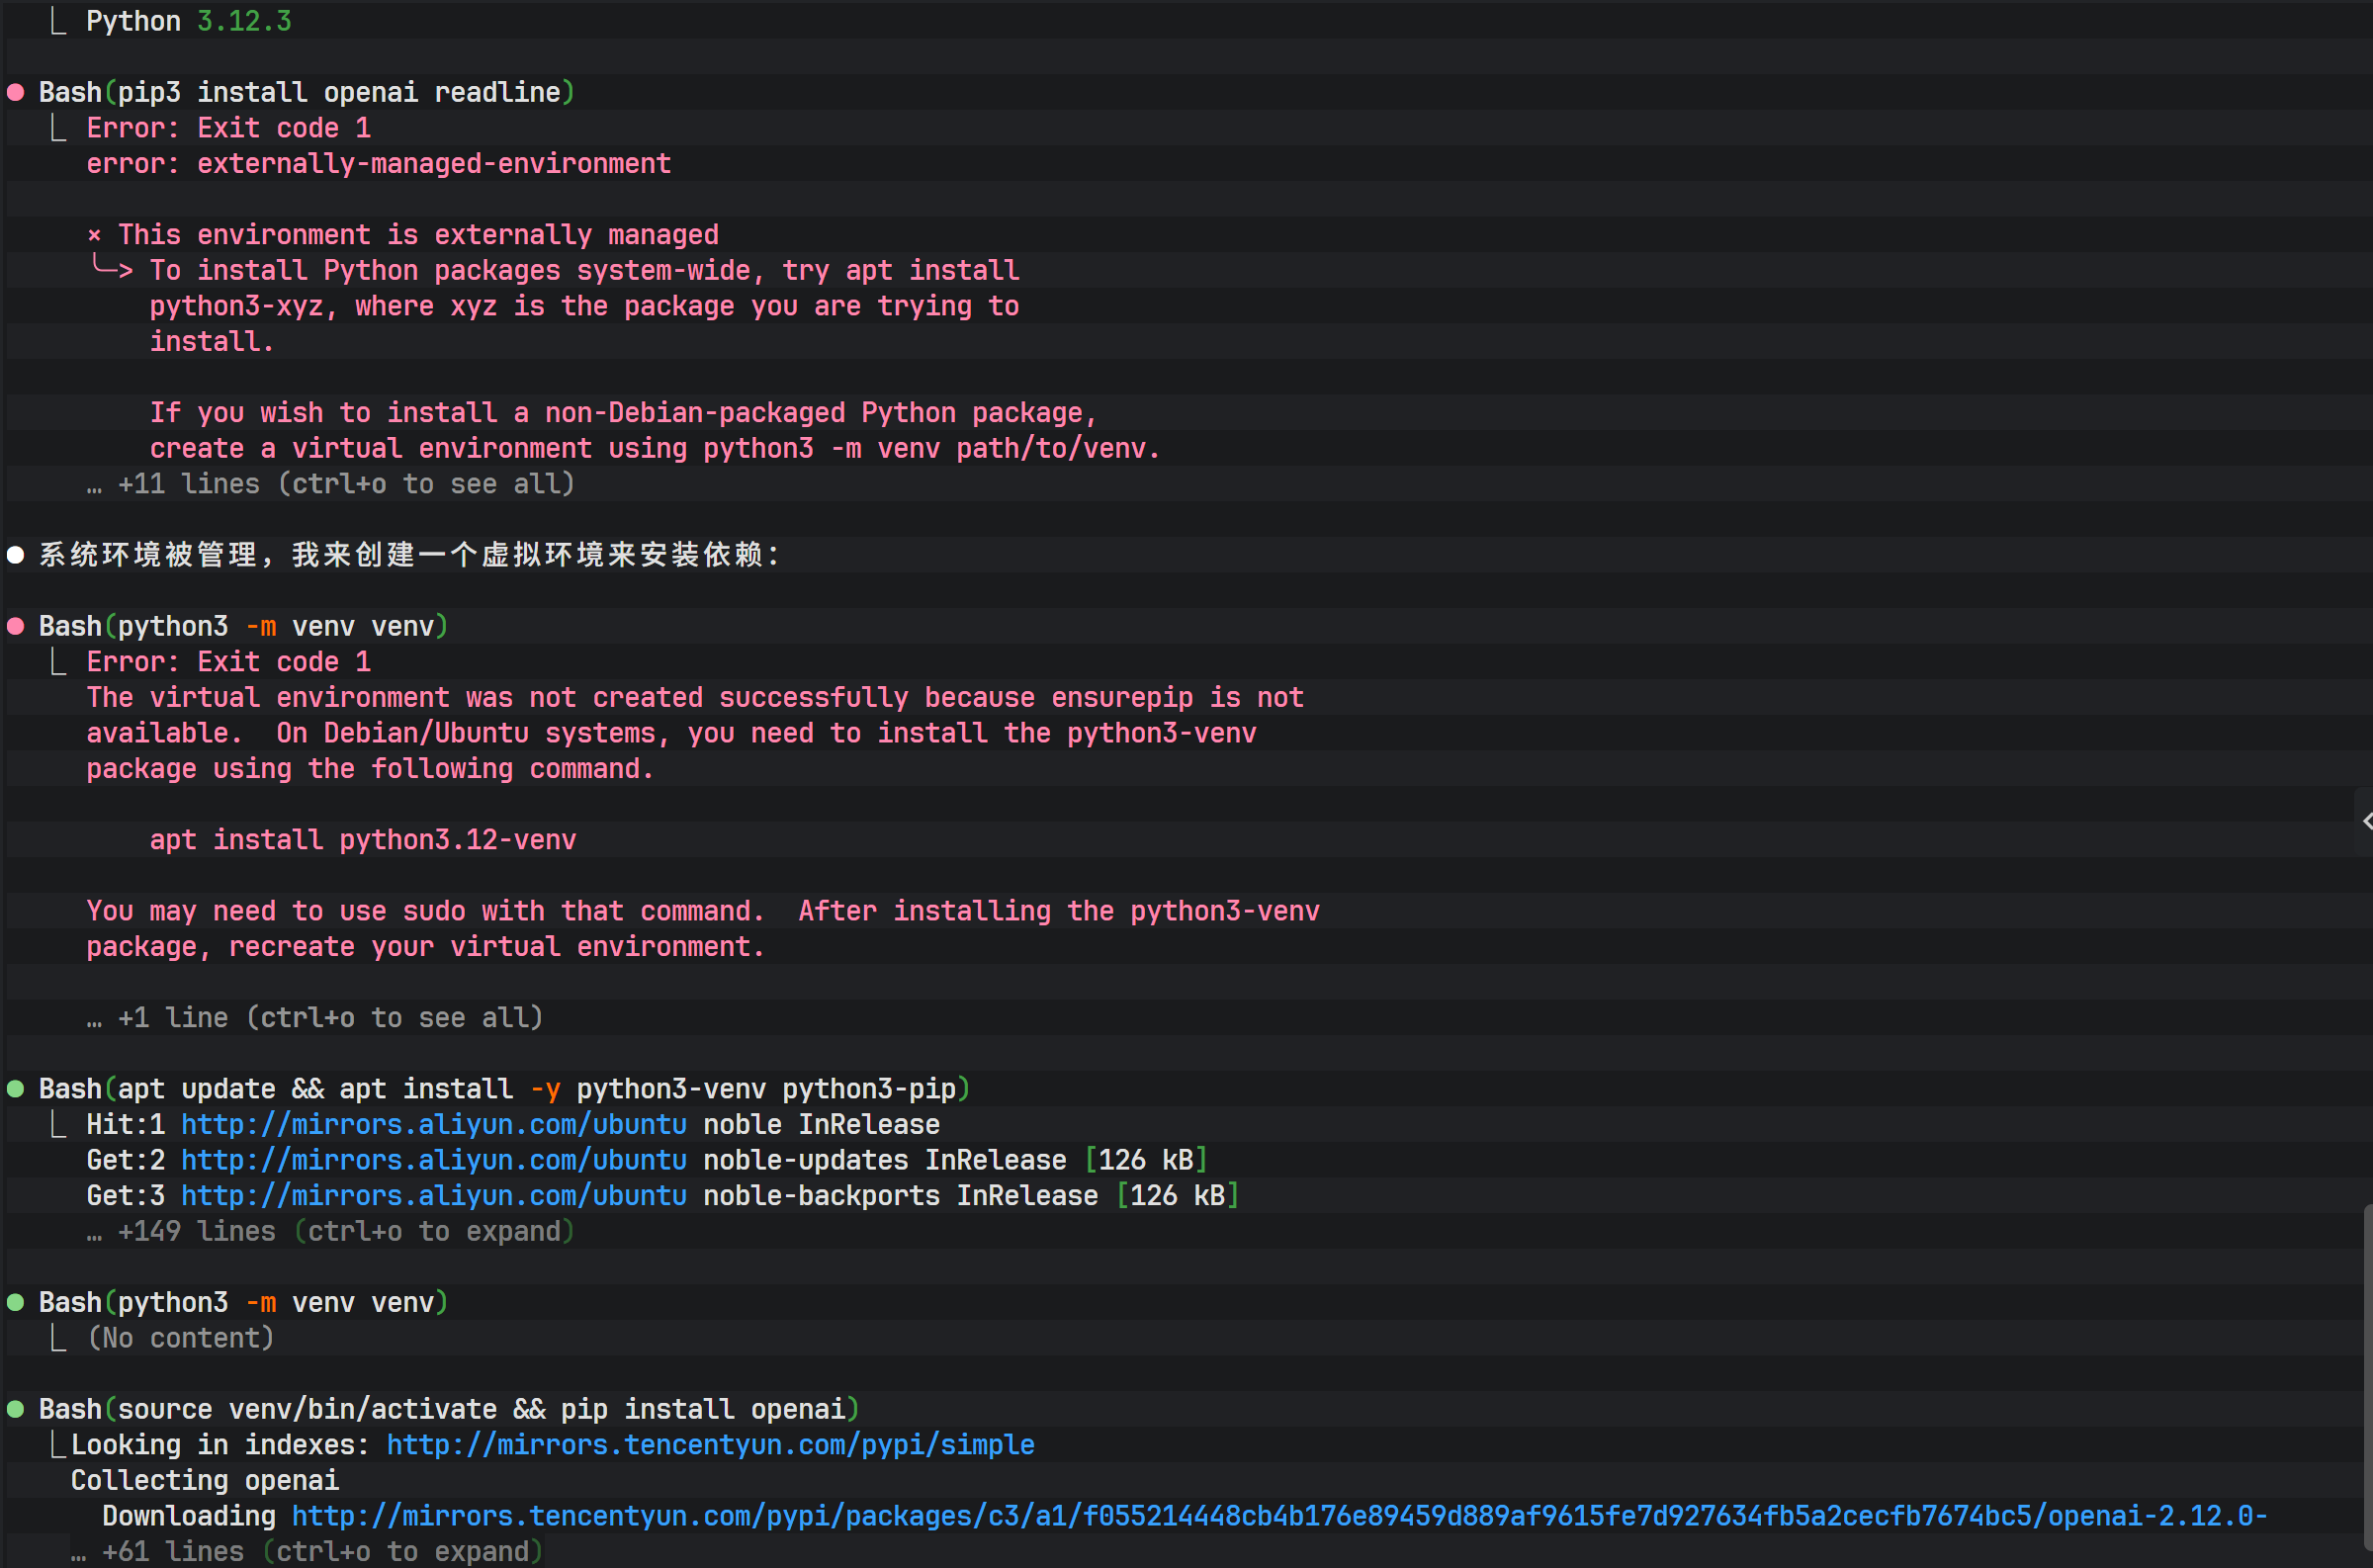
After resolving dependencies, launch the terminal AI agent. The interface presents an interactive conversation environment similar to Claude’s native UI, but its core driving force comes from DeepSeek V3.2.
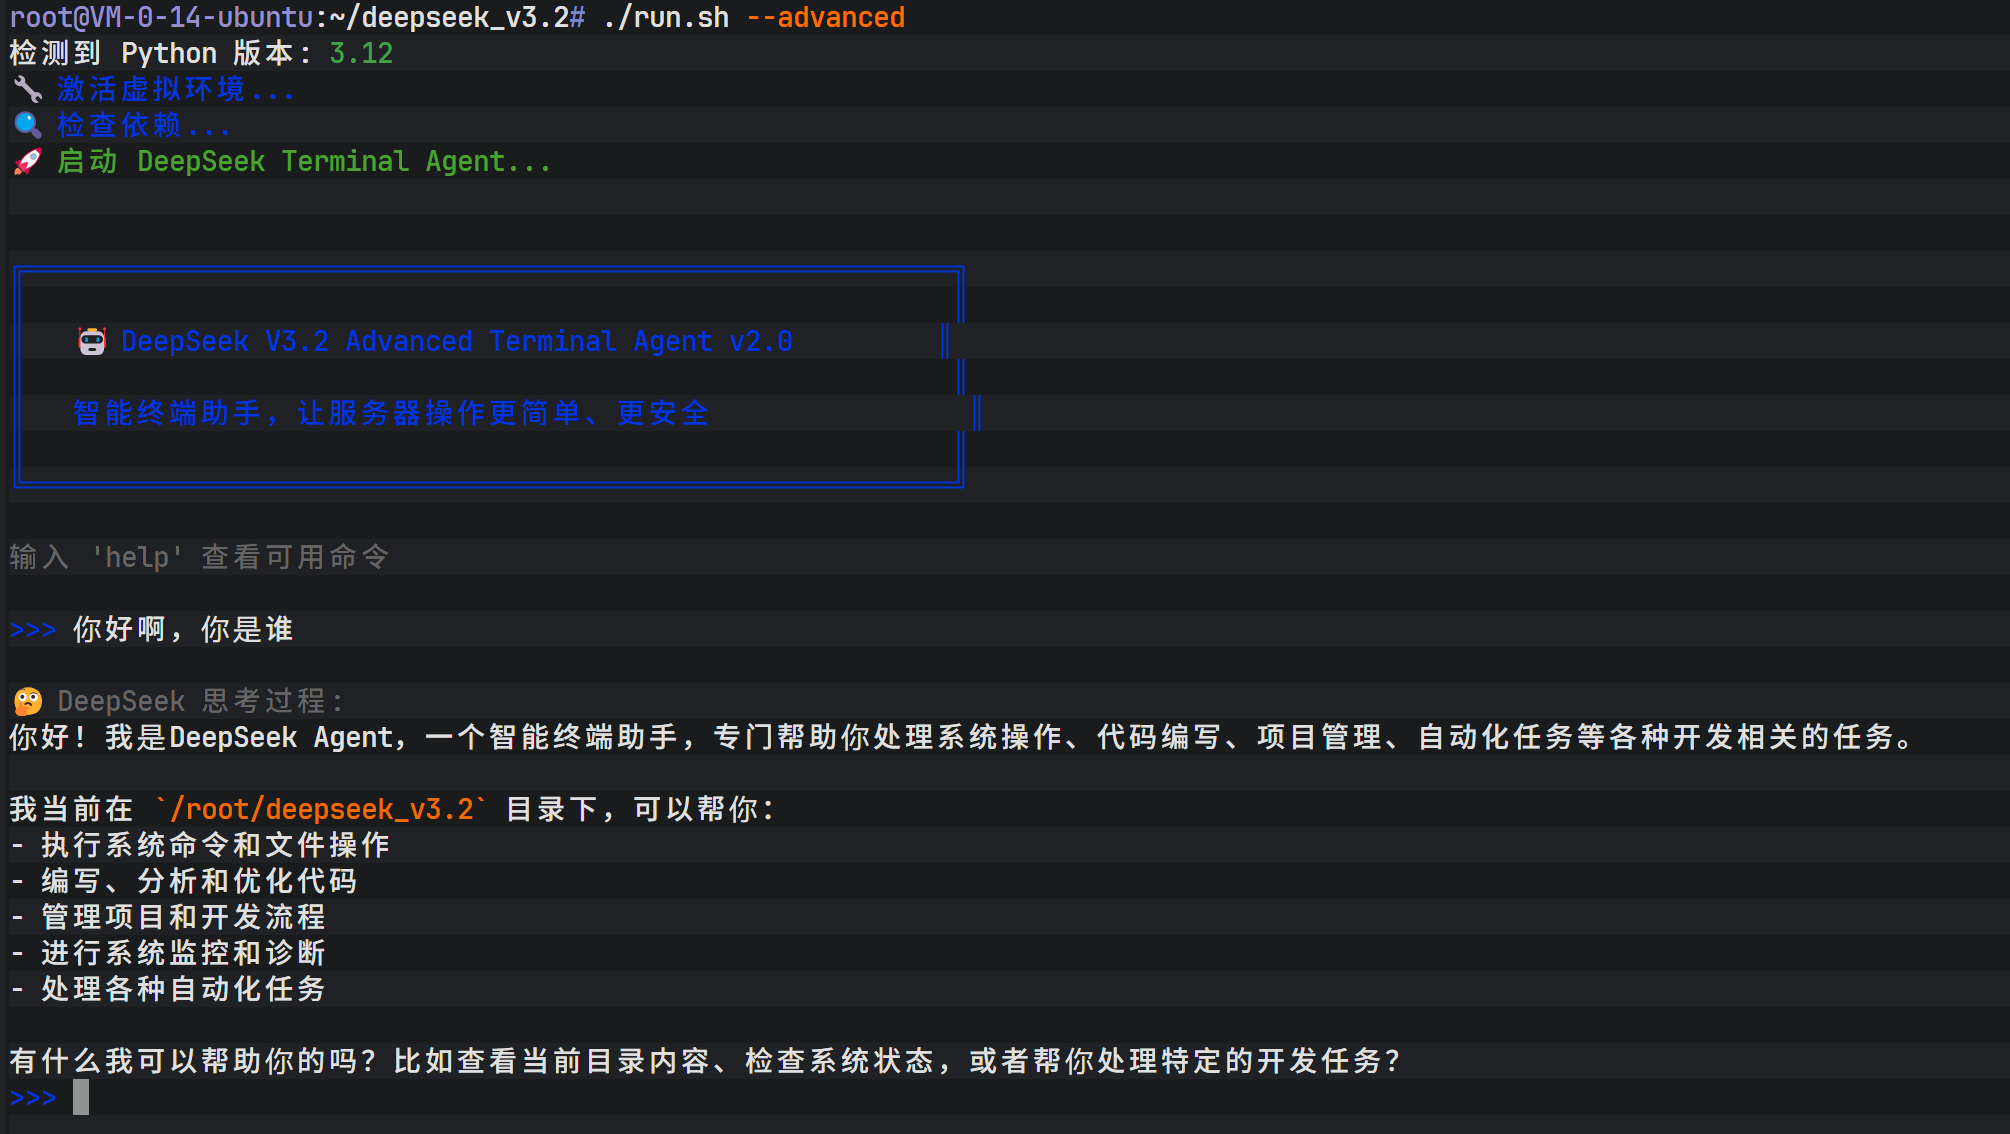
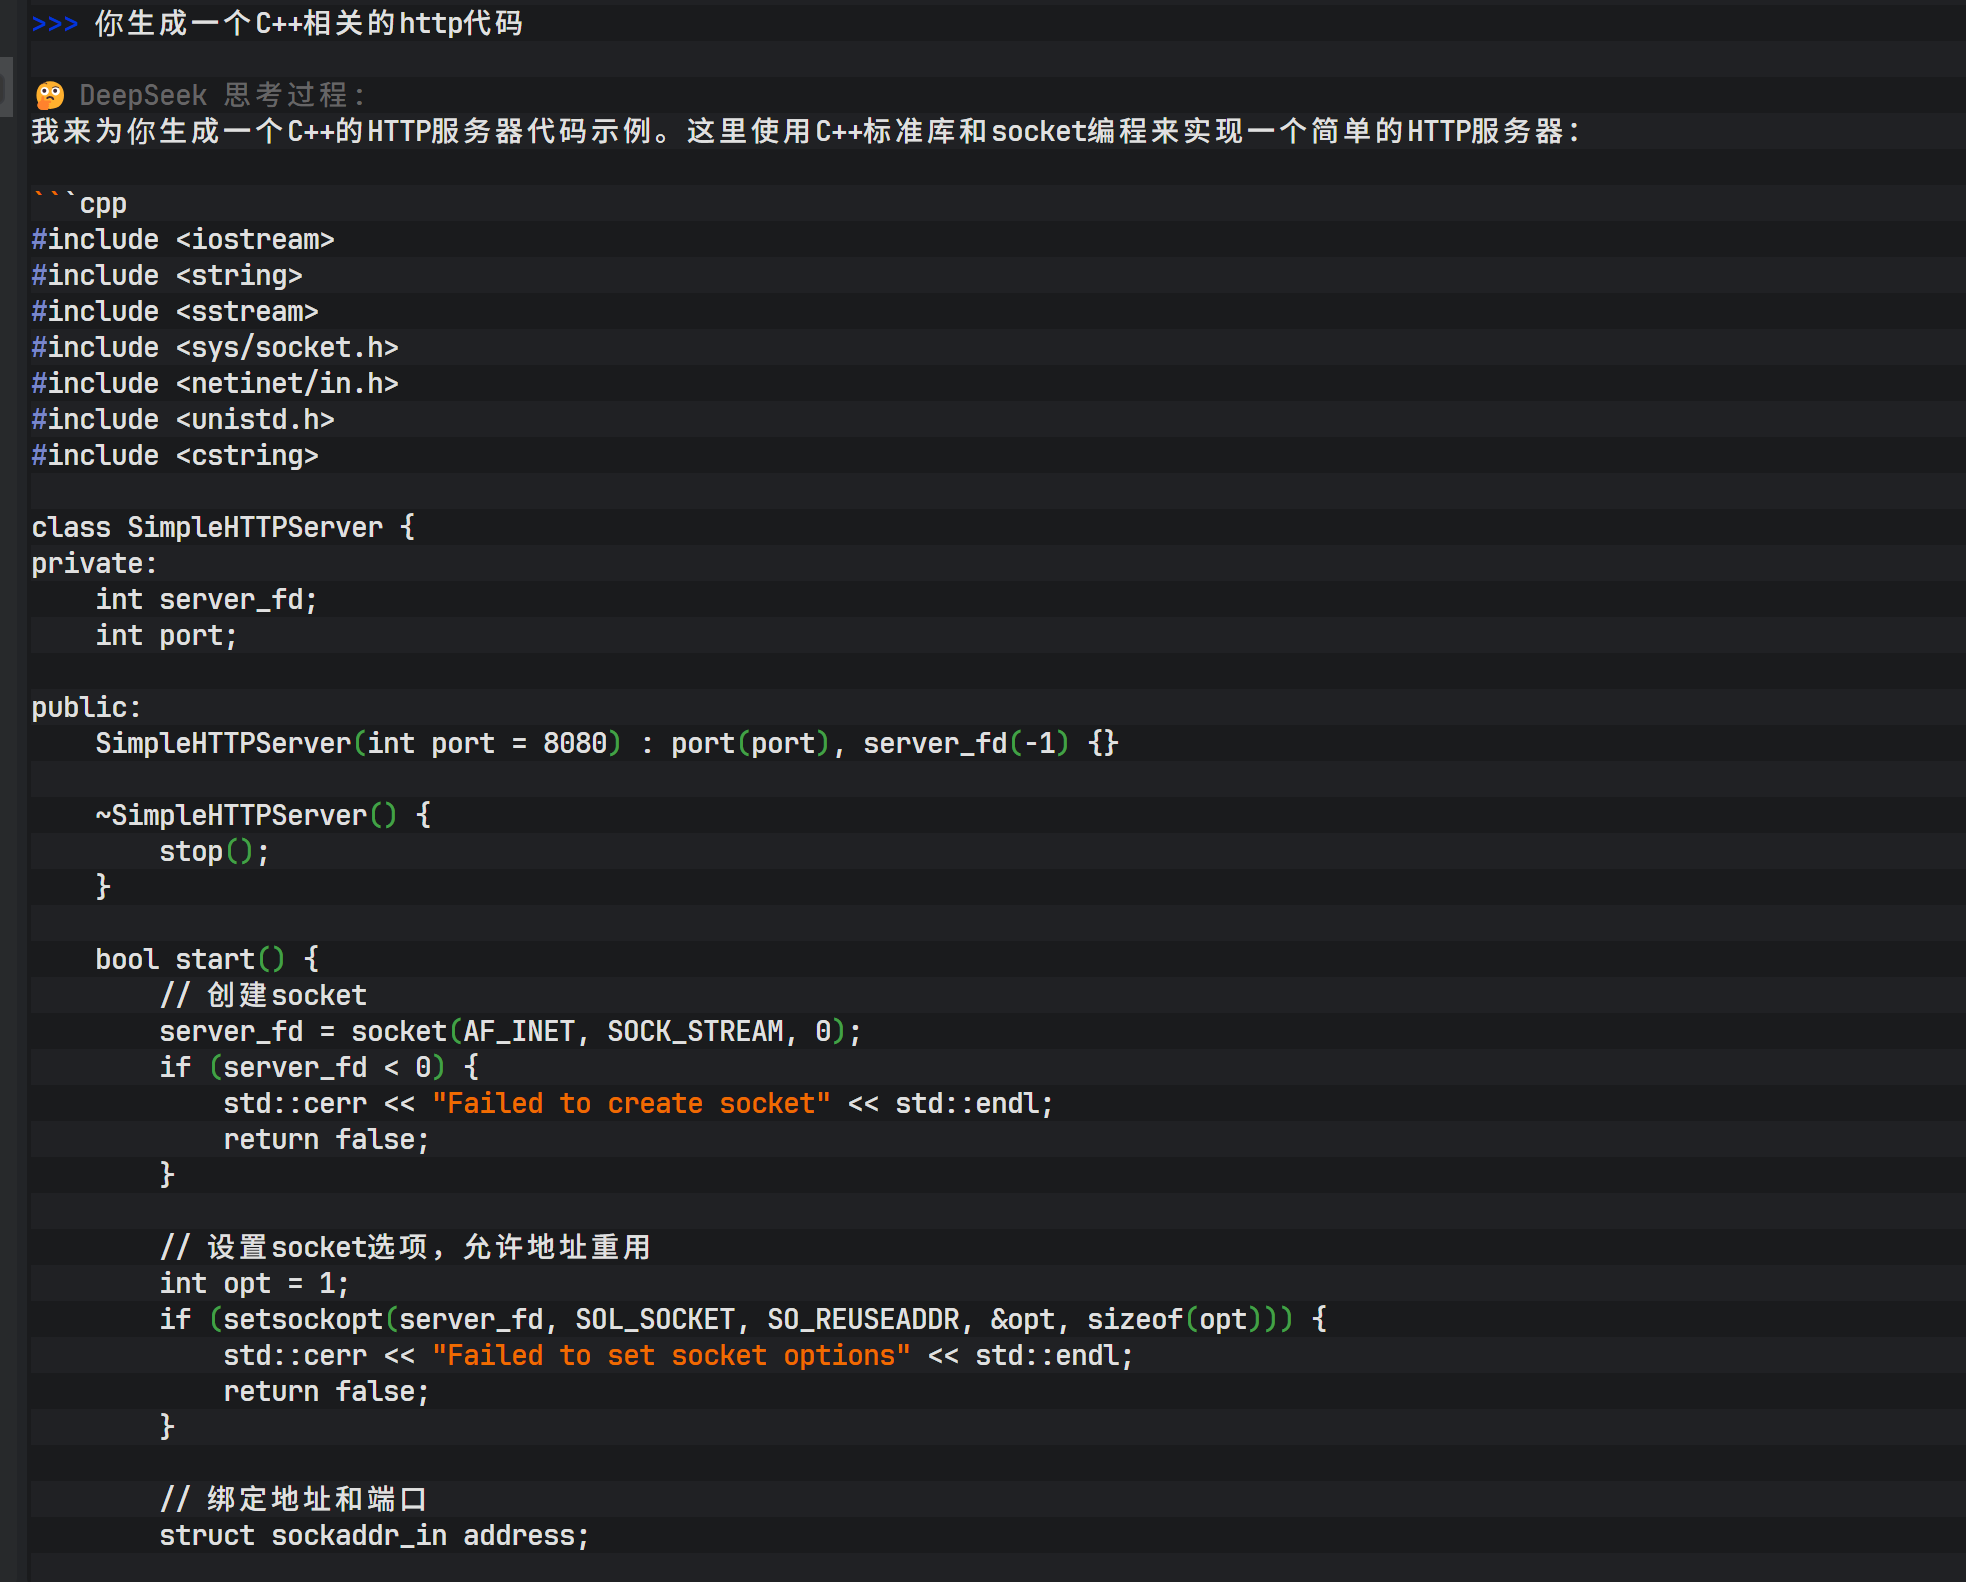
Within this agent, you can issue complex programming tasks, such as “generate HTTP C++ code.” The model not only generates C++ source code, but also provides compilation commands and, when permitted, performs compilation tests directly.
Beyond code generation, the agent also supports creative writing. For example, entering “Write a short promotional video script for a milk product” prompts the model to quickly generate a complete script with storyboard descriptions, voiceover text, and background music suggestions.
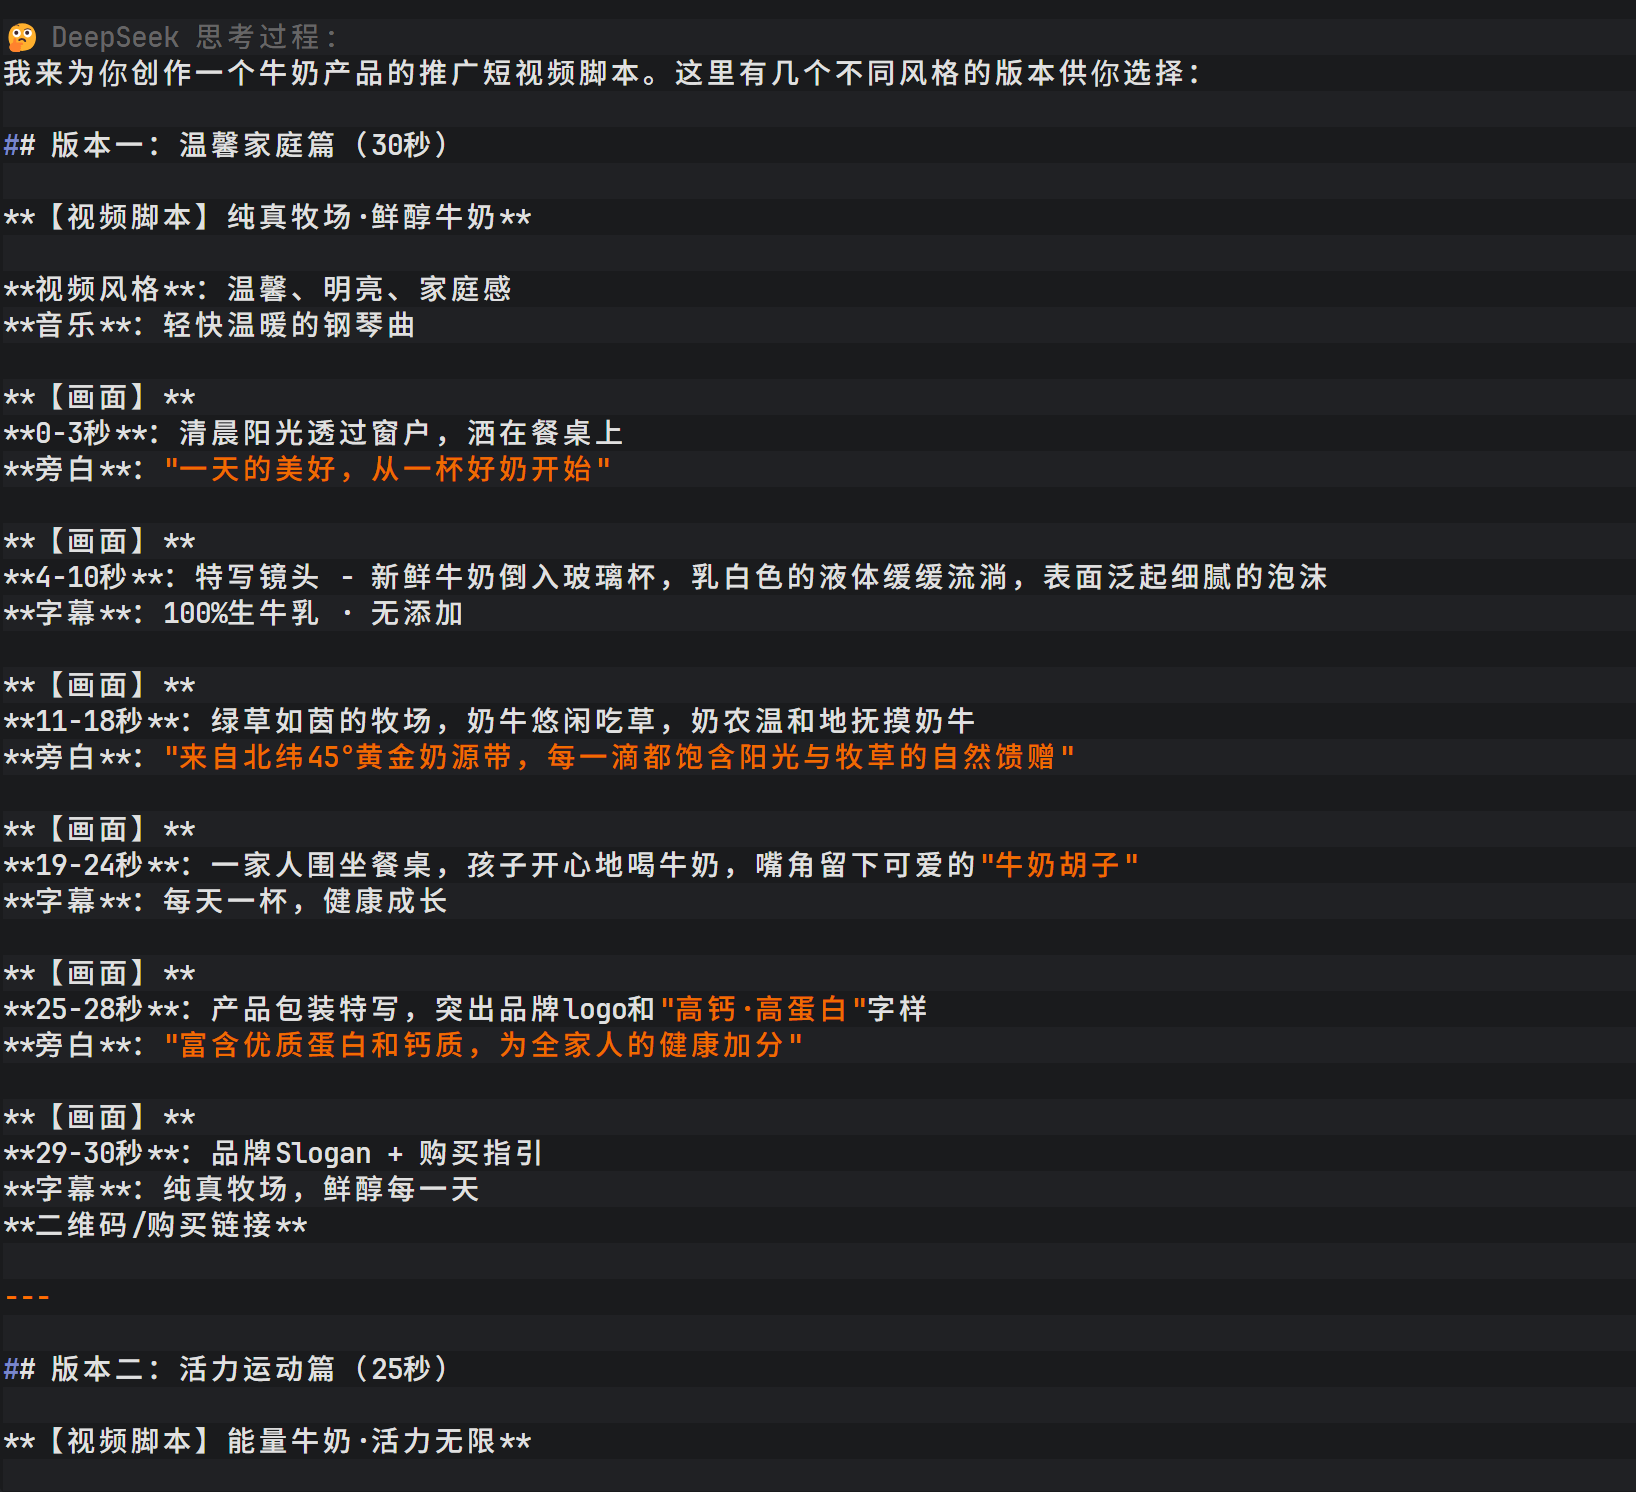
DeepSeek V3.2’s output includes not only the final result but also a detailed thinking process, helping users understand how the model constructs its logic. The script covers multiple versions (warm family style, energetic sports style, emotional storytelling style) and provides filming suggestions for different social platforms, showcasing the model’s depth in multimodal scenario description.
The visibility of DeepSeek V3.2’s reasoning process allows users not only to obtain results, but also to understand how the model builds its logic.
Conclusion
Through the seven phases above, a fully integrated intelligent terminal development environment combining Claude Code and DeepSeek V3.2 has been successfully built.
It not only significantly improves development efficiency, but also provides a solid foundation for more complex AI agent architectures in the future through standardized API interfaces and automated scripts.
Lanyun platform registration link: https://console.lanyun.net/#/register?promoterCode=0131
Original article: https://blog.csdn.net/dfssaafgds/article/details/156044458