Unlocking DeepSeek’s Potential: A New Paradigm for Local Large Model Deployment with Docker + Ollama
I. Introduction
1. What is Docker?
Docker: Think of it as a "packaged app"
Imagine you wrote a great program that runs perfectly on your computer. But when you share it with others, you may encounter issues like:
- "This software requires Python 3.8, but I only have Python 3.6!"
- "I don’t have that library installed — it failed to run!"
- "Your program runs on Linux, but I’m using Windows!"
💡 The role of Docker: It’s like a “packaged app” that bundles your software, dependencies, environment, and system configurations all inside a ‘container’. Anyone who gets this container can run it directly — no need to worry about internal setup details.
🚀 Think of Docker as a shipping container
Traditional shipping vs. container shipping:
- Before (Traditional Deployment):
- Goods (programs) needed different packaging (runtime environments)
- Goods could be damaged (environment incompatibility)
- Loading/unloading was complicated (hard to migrate programs)
- With Docker (Container Deployment):
- Goods are placed in standardized containers (Docker containers)
- No matter where it’s shipped, the contents remain the same (consistent environment)
- Ports and ships can load/unload easily (deploy on different systems seamlessly)
Docker makes software standardized, portable, and easy to deploy — just like shipping containers! 🚢

2. What is Ollama?
Ollama is a tool for running large language models (LLMs) locally. It allows you to run AI models directly on your own computer without connecting to cloud servers.
💡 Simply put: Ollama lets you run ChatGPT, Llama, Mistral, Gemma, and other large models locally, just like running any desktop app.
🚀 Key features of Ollama:
- Local inference 🏠: Works offline, ensuring data privacy.
- Supports multiple open-source models 📚: Llama 3, Mistral, Gemma, and more.
- Easy to install and use 🔧: Run in just a few commands.
- Lightweight and optimized ⚡: Works on Mac, Linux, and Windows, with GPU acceleration support.
- Offline operation 🔒: Fully local, no cloud dependency.
II. Preparation
1. Operating System
This tutorial uses CentOS 7.9 (4 cores, 8GB RAM), but you can also use other Linux distributions or Windows.
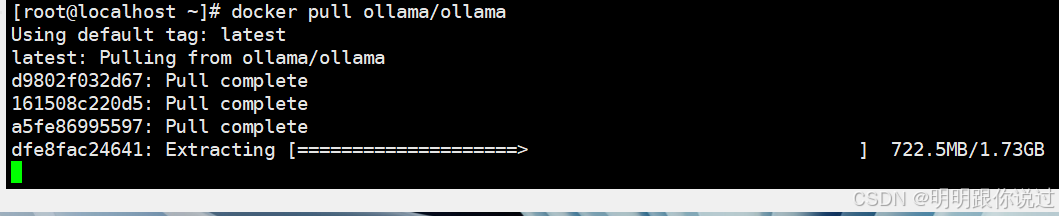
2. Docker Image Preparation
Prepare the image in advance: ollama/ollama. It’s large, so downloading may take some time.
III. Installation
1. Install Docker
① Disable the firewall:
systemctl stop firewalld && systemctl disable firewalld② Disable SELinux:
setenforce 0③ Update yum sources:
rm -f /etc/yum.repos.d/*
curl -o /etc/yum.repos.d/CentOS-Base.repo http://mirrors.aliyun.com/repo/Centos-7.repo
yum clean all && yum makecache
④ Install dependencies:
yum install -y yum-utils device-mapper-persistent-data lvm2⑤ Add Docker repository:
yum-config-manager --add-repo http://mirrors.aliyun.com/docker-ce/linux/centos/docker-ce.repo⑥ Install Docker:
yum install docker-ce -y⑦ Configure mirror acceleration:
vim /etc/docker/daemon.json
{
  "registry-mirrors": ["https://registry.docker-cn.com"]
}
systemctl restart docker
systemctl enable docker
2. Start the Ollama Container
docker run -d --name ollama -p 11434:11434 ollama/ollamaThe first startup will automatically download the Ollama runtime environment.
3. Pull the DeepSeek Model
docker exec -it ollama ollama pull deepseek-coder:33bYou can choose different model sizes depending on your hardware, such as deepseek-coder:7b or deepseek-coder:33b.
4. Run DeepSeek
docker exec -it ollama ollama run deepseek-coder:33bThen open your browser and visit:
http://localhost:11434🎉 Congratulations! You can now run the DeepSeek model locally!
💡 Summary:
With Docker + Ollama, you can quickly run large language models locally — secure, private, and flexible!